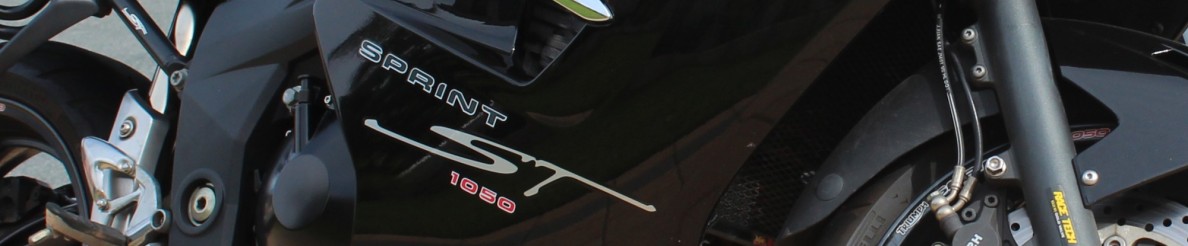
So, after buying my bike I decided that as nice as it is, the muffler makes the bike sound a little tame, I’m comparing this to my GSXR 1000 with a yoshi pipe, so as you could probably imagine its quite a difference.
I started looking for an after market muffler, and was quite shocked to see the price the few manufactures that make cans for the 1050 sprint were asking, especially high for me as I’m in Perth, Western Australia.
So I started the research process and found quite a bit of information at Triumph RAT. (Riders Association of Triumph, I think).
Ralphus a senior member of Triumph RAT has done a fantastic “how to” on modifying a standard muffler into a TOR (Triumph Off Road) styled muffler, way back in 2008. The title of the post is “How to build a better boat anchor“. (When you see the size of the muffler you’ll understand the boat anchor reference.) Ralphus was inspired to carry out his modification (referred to as a bafflectomy ) by a post from Lemansnz also a senior member, who did the original mod.
So after reading both treads and some other banter around the site I’ve decided to have a crack at a similar mod to Ralphus’s version. Now bear in mind I like it loud, I understand that the exhaust system is designed to give some back pressure, however looking at after market designs there’s no back and forth of exhaust gasses through various plenums and ports, basically they are all straight thru systems, with engine performance coming from a good tune. So that said here is my muffler modification.
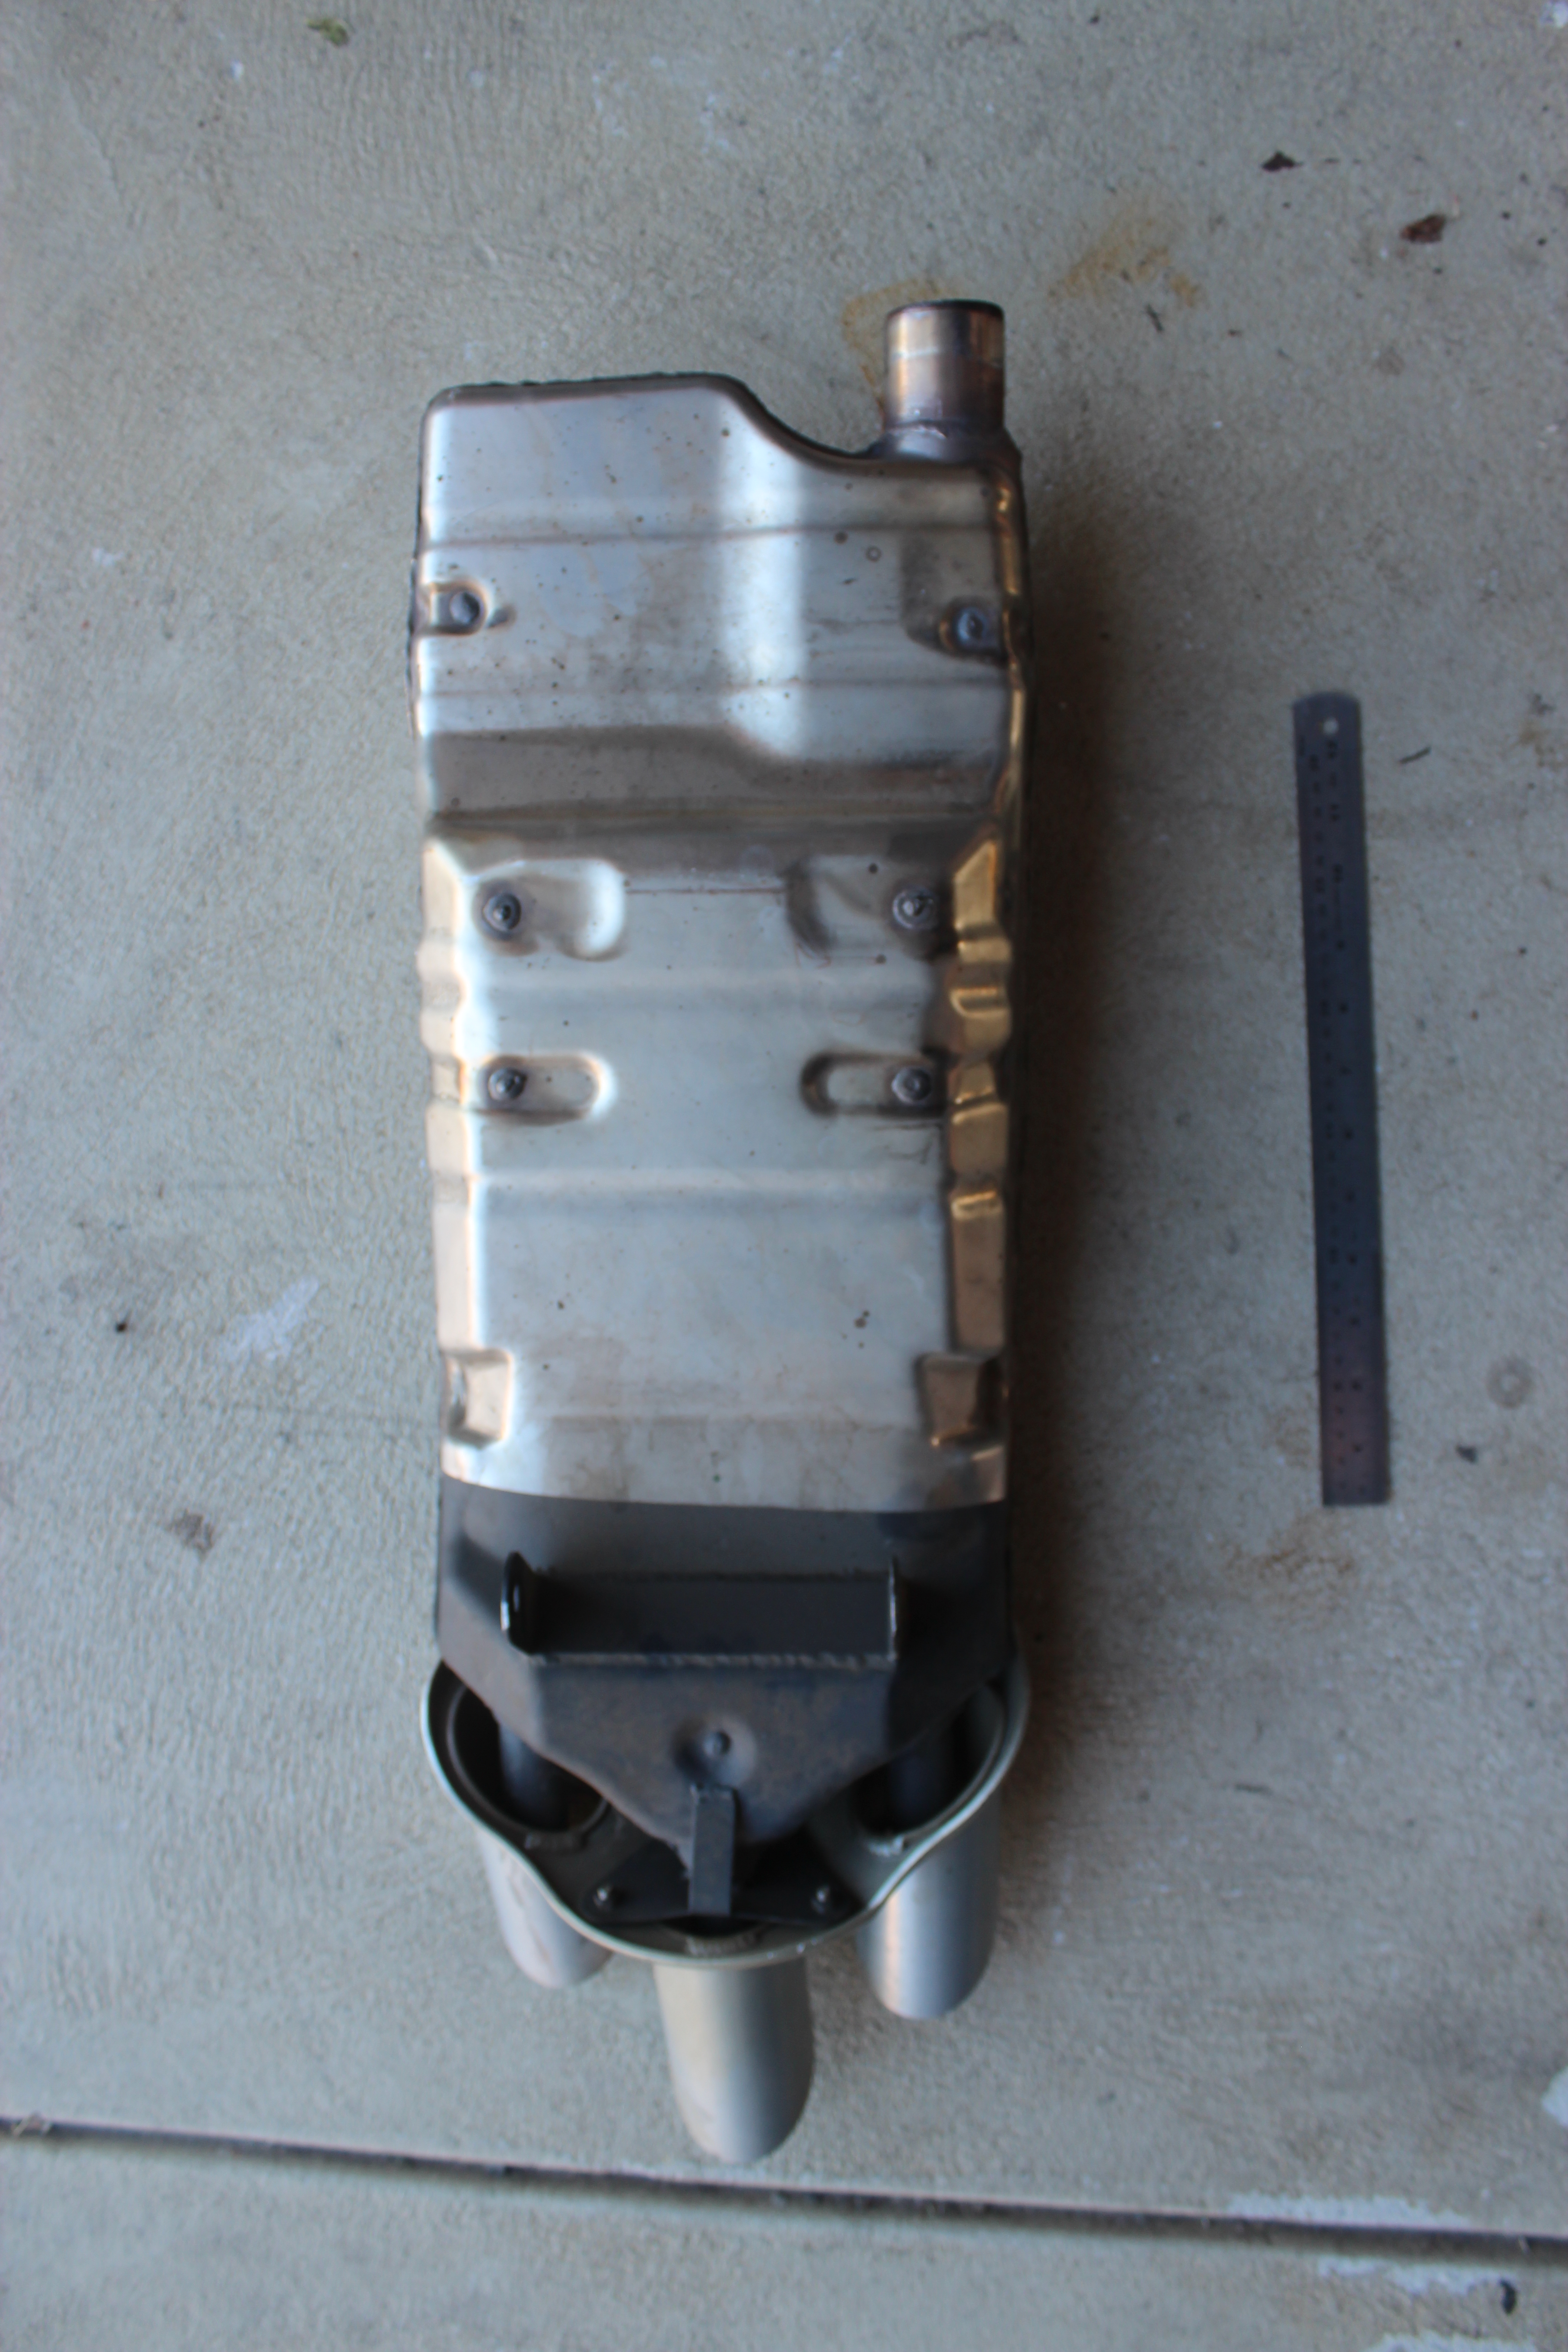
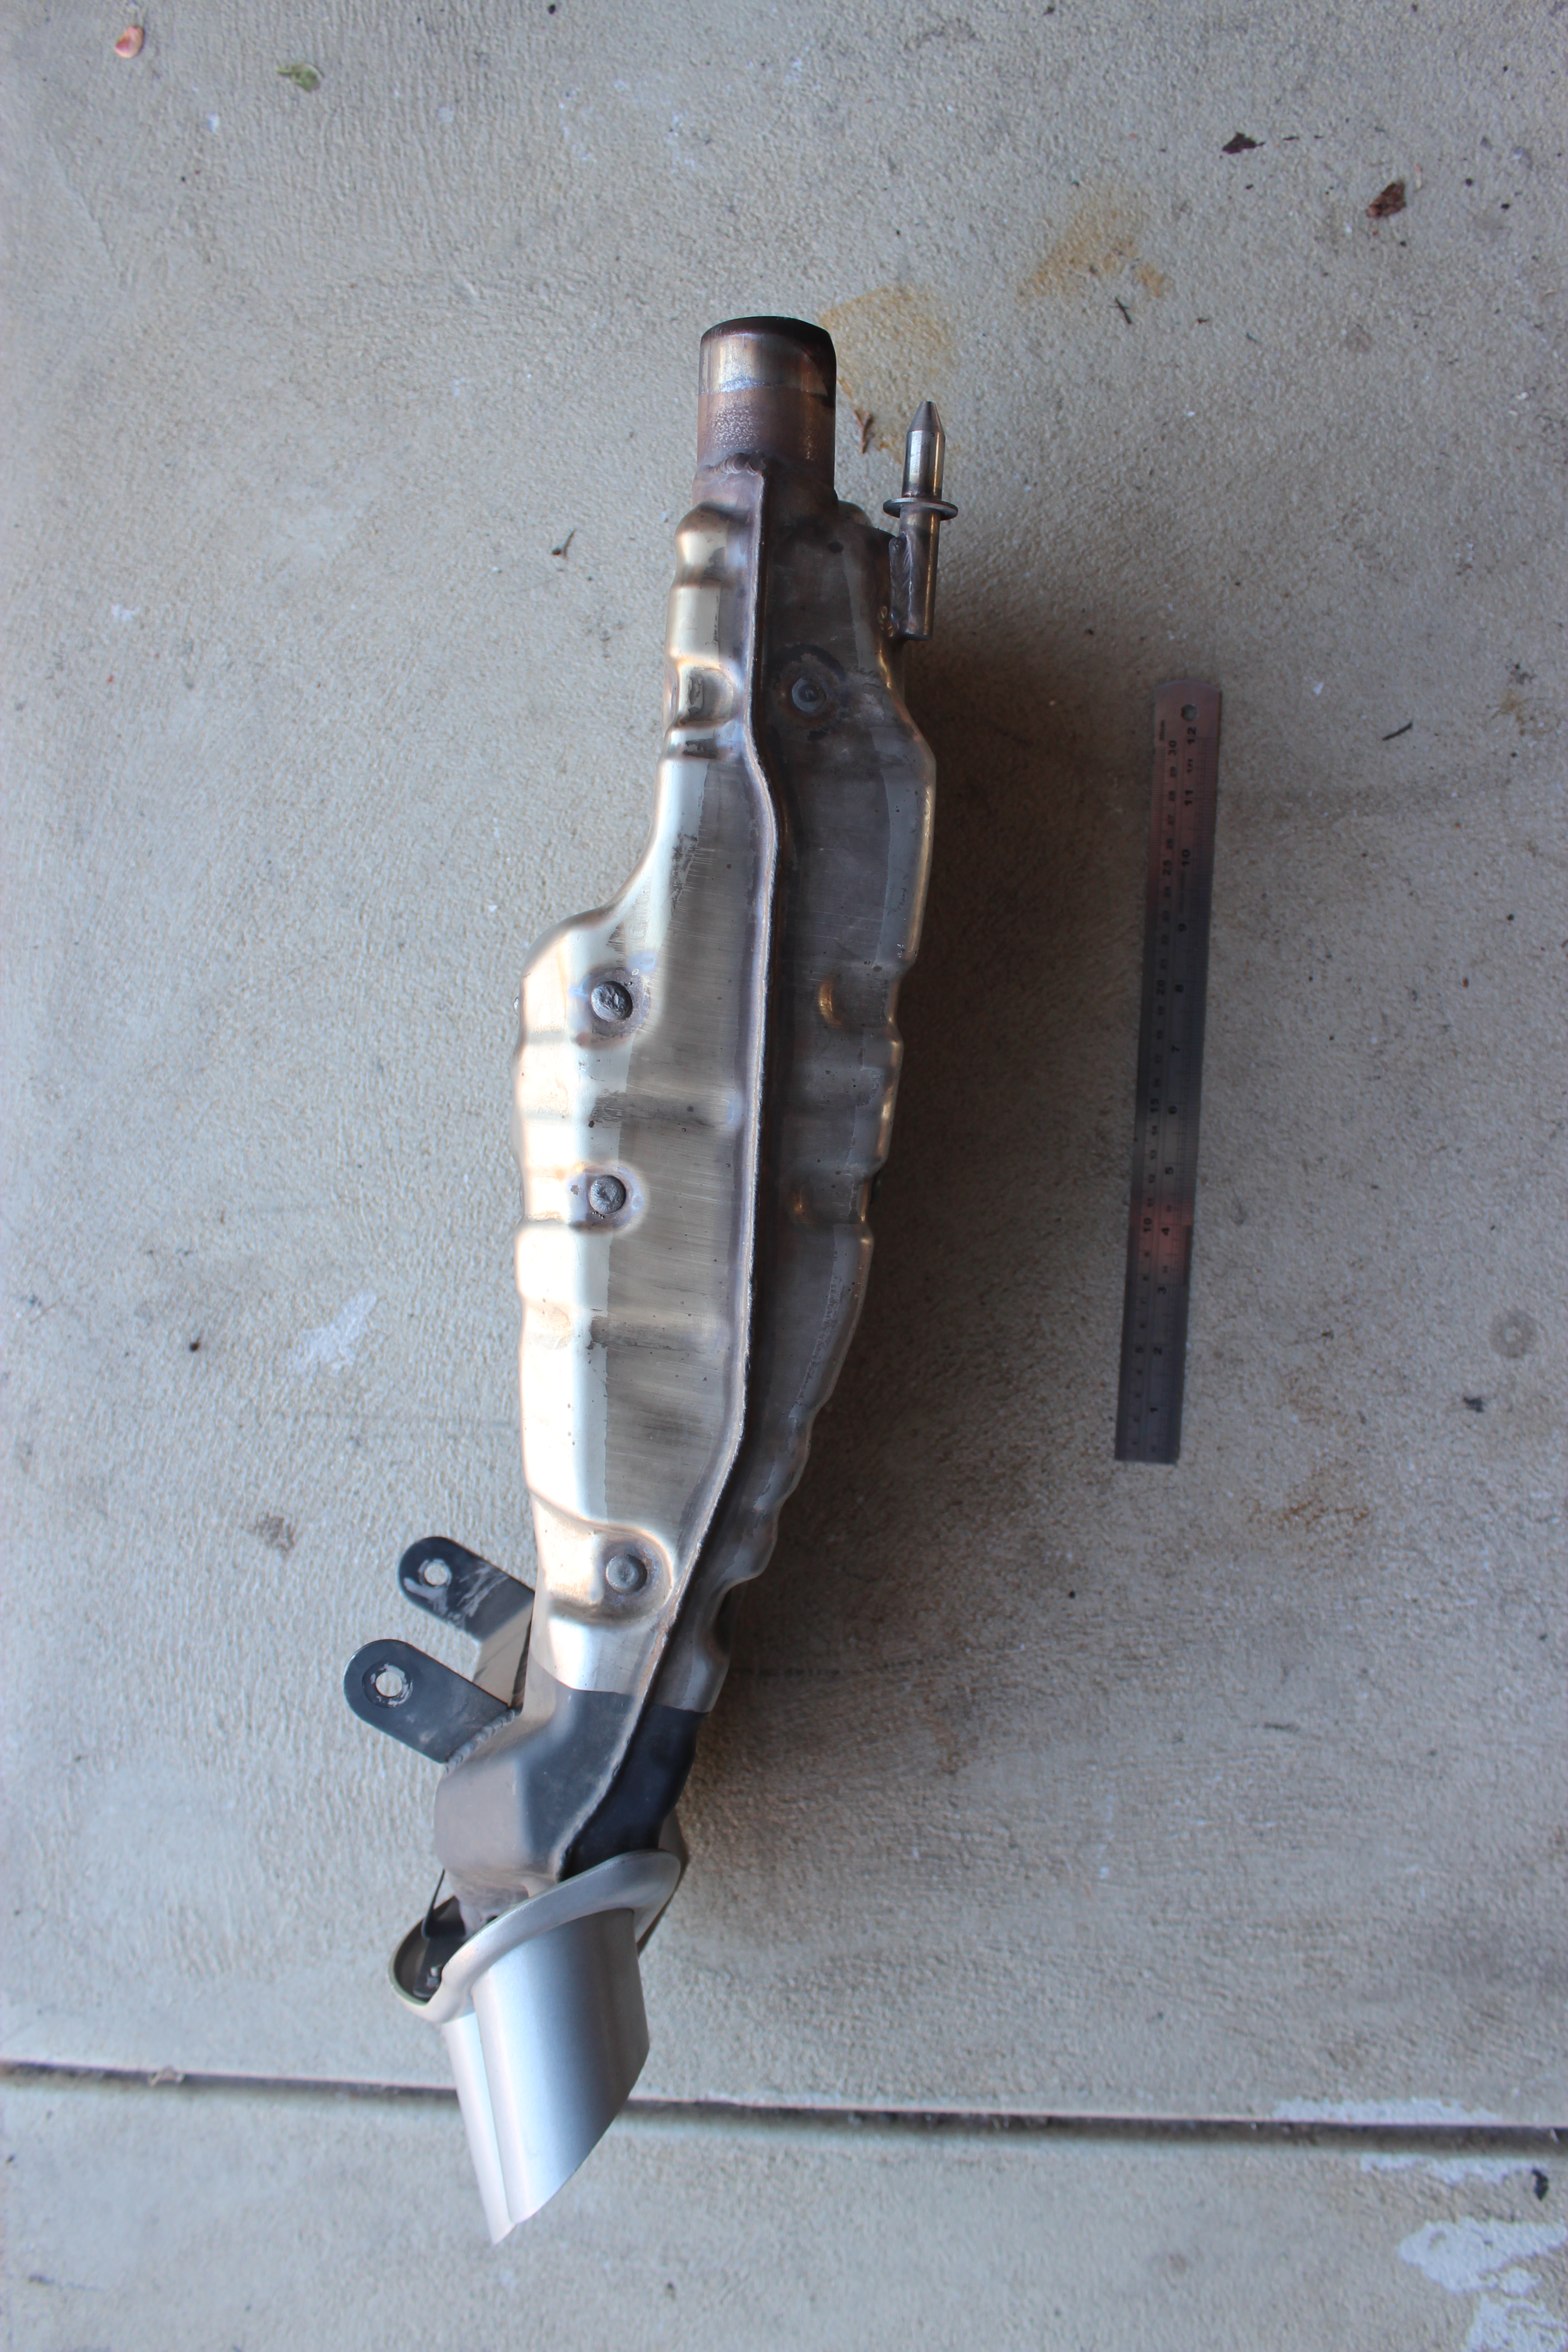
The muffler plus the link pipe that I’ll be using for part of the internals.
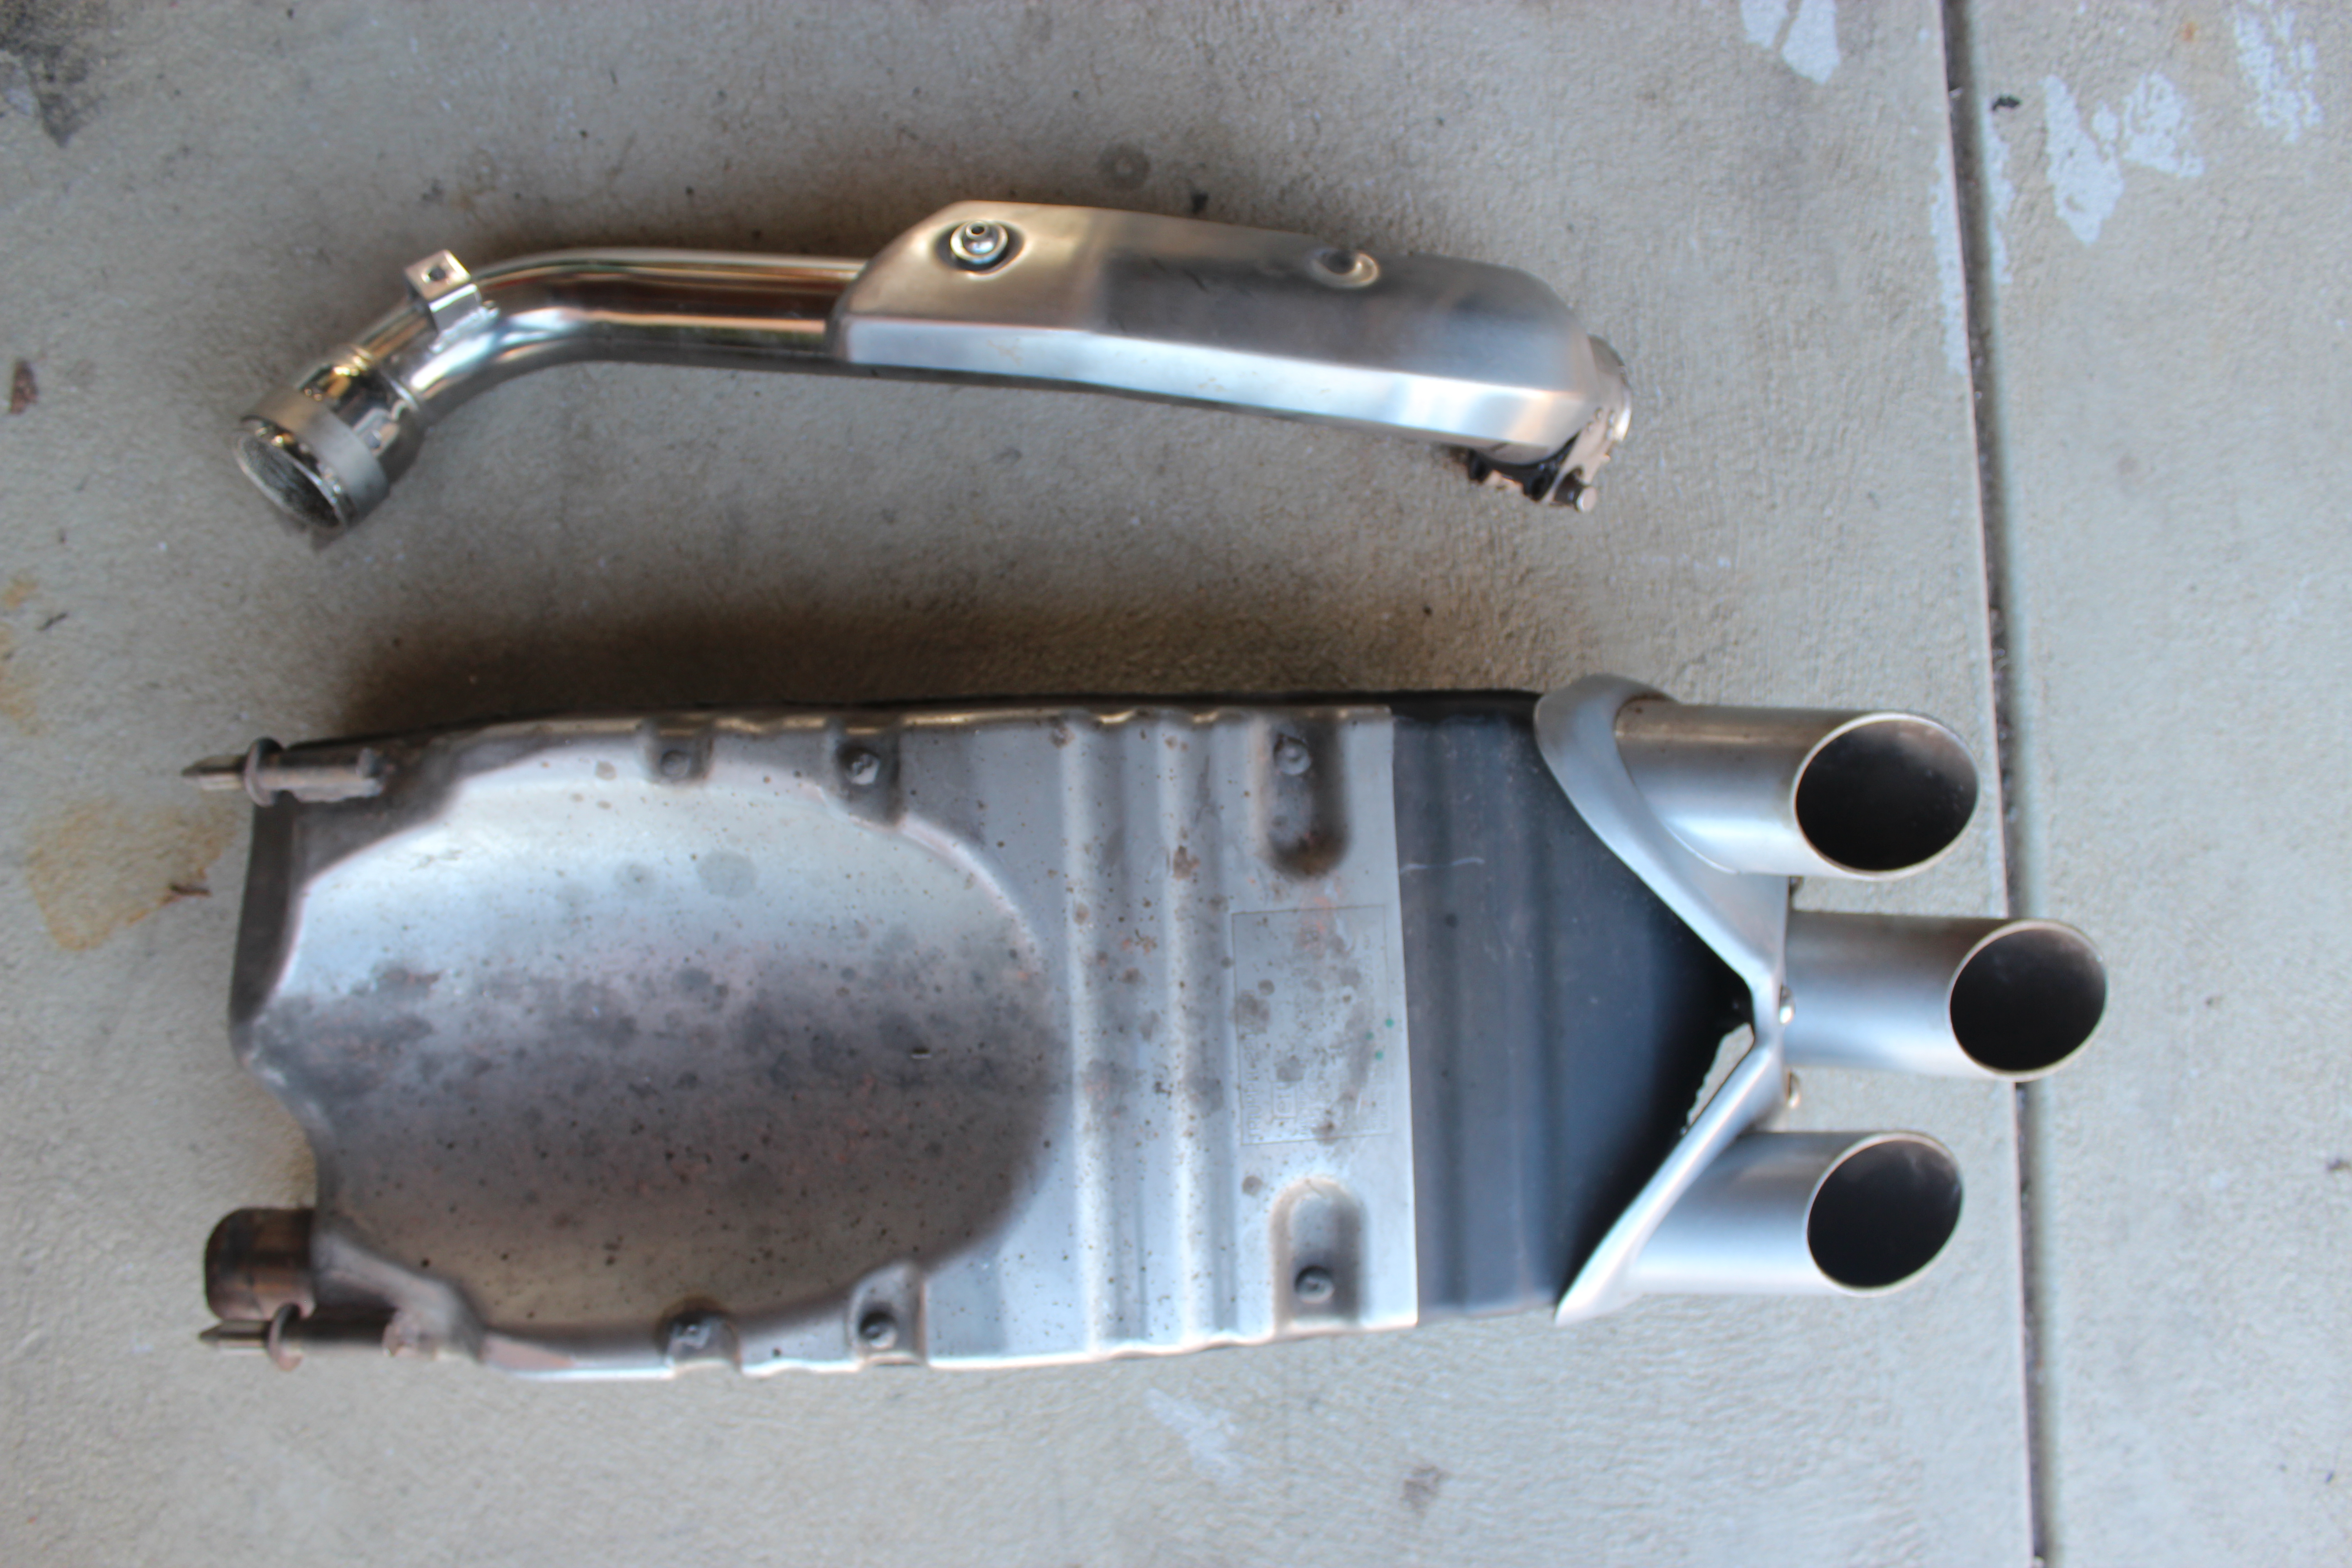
As you can see from the ruler in these pictures this thing is bloody huge !!
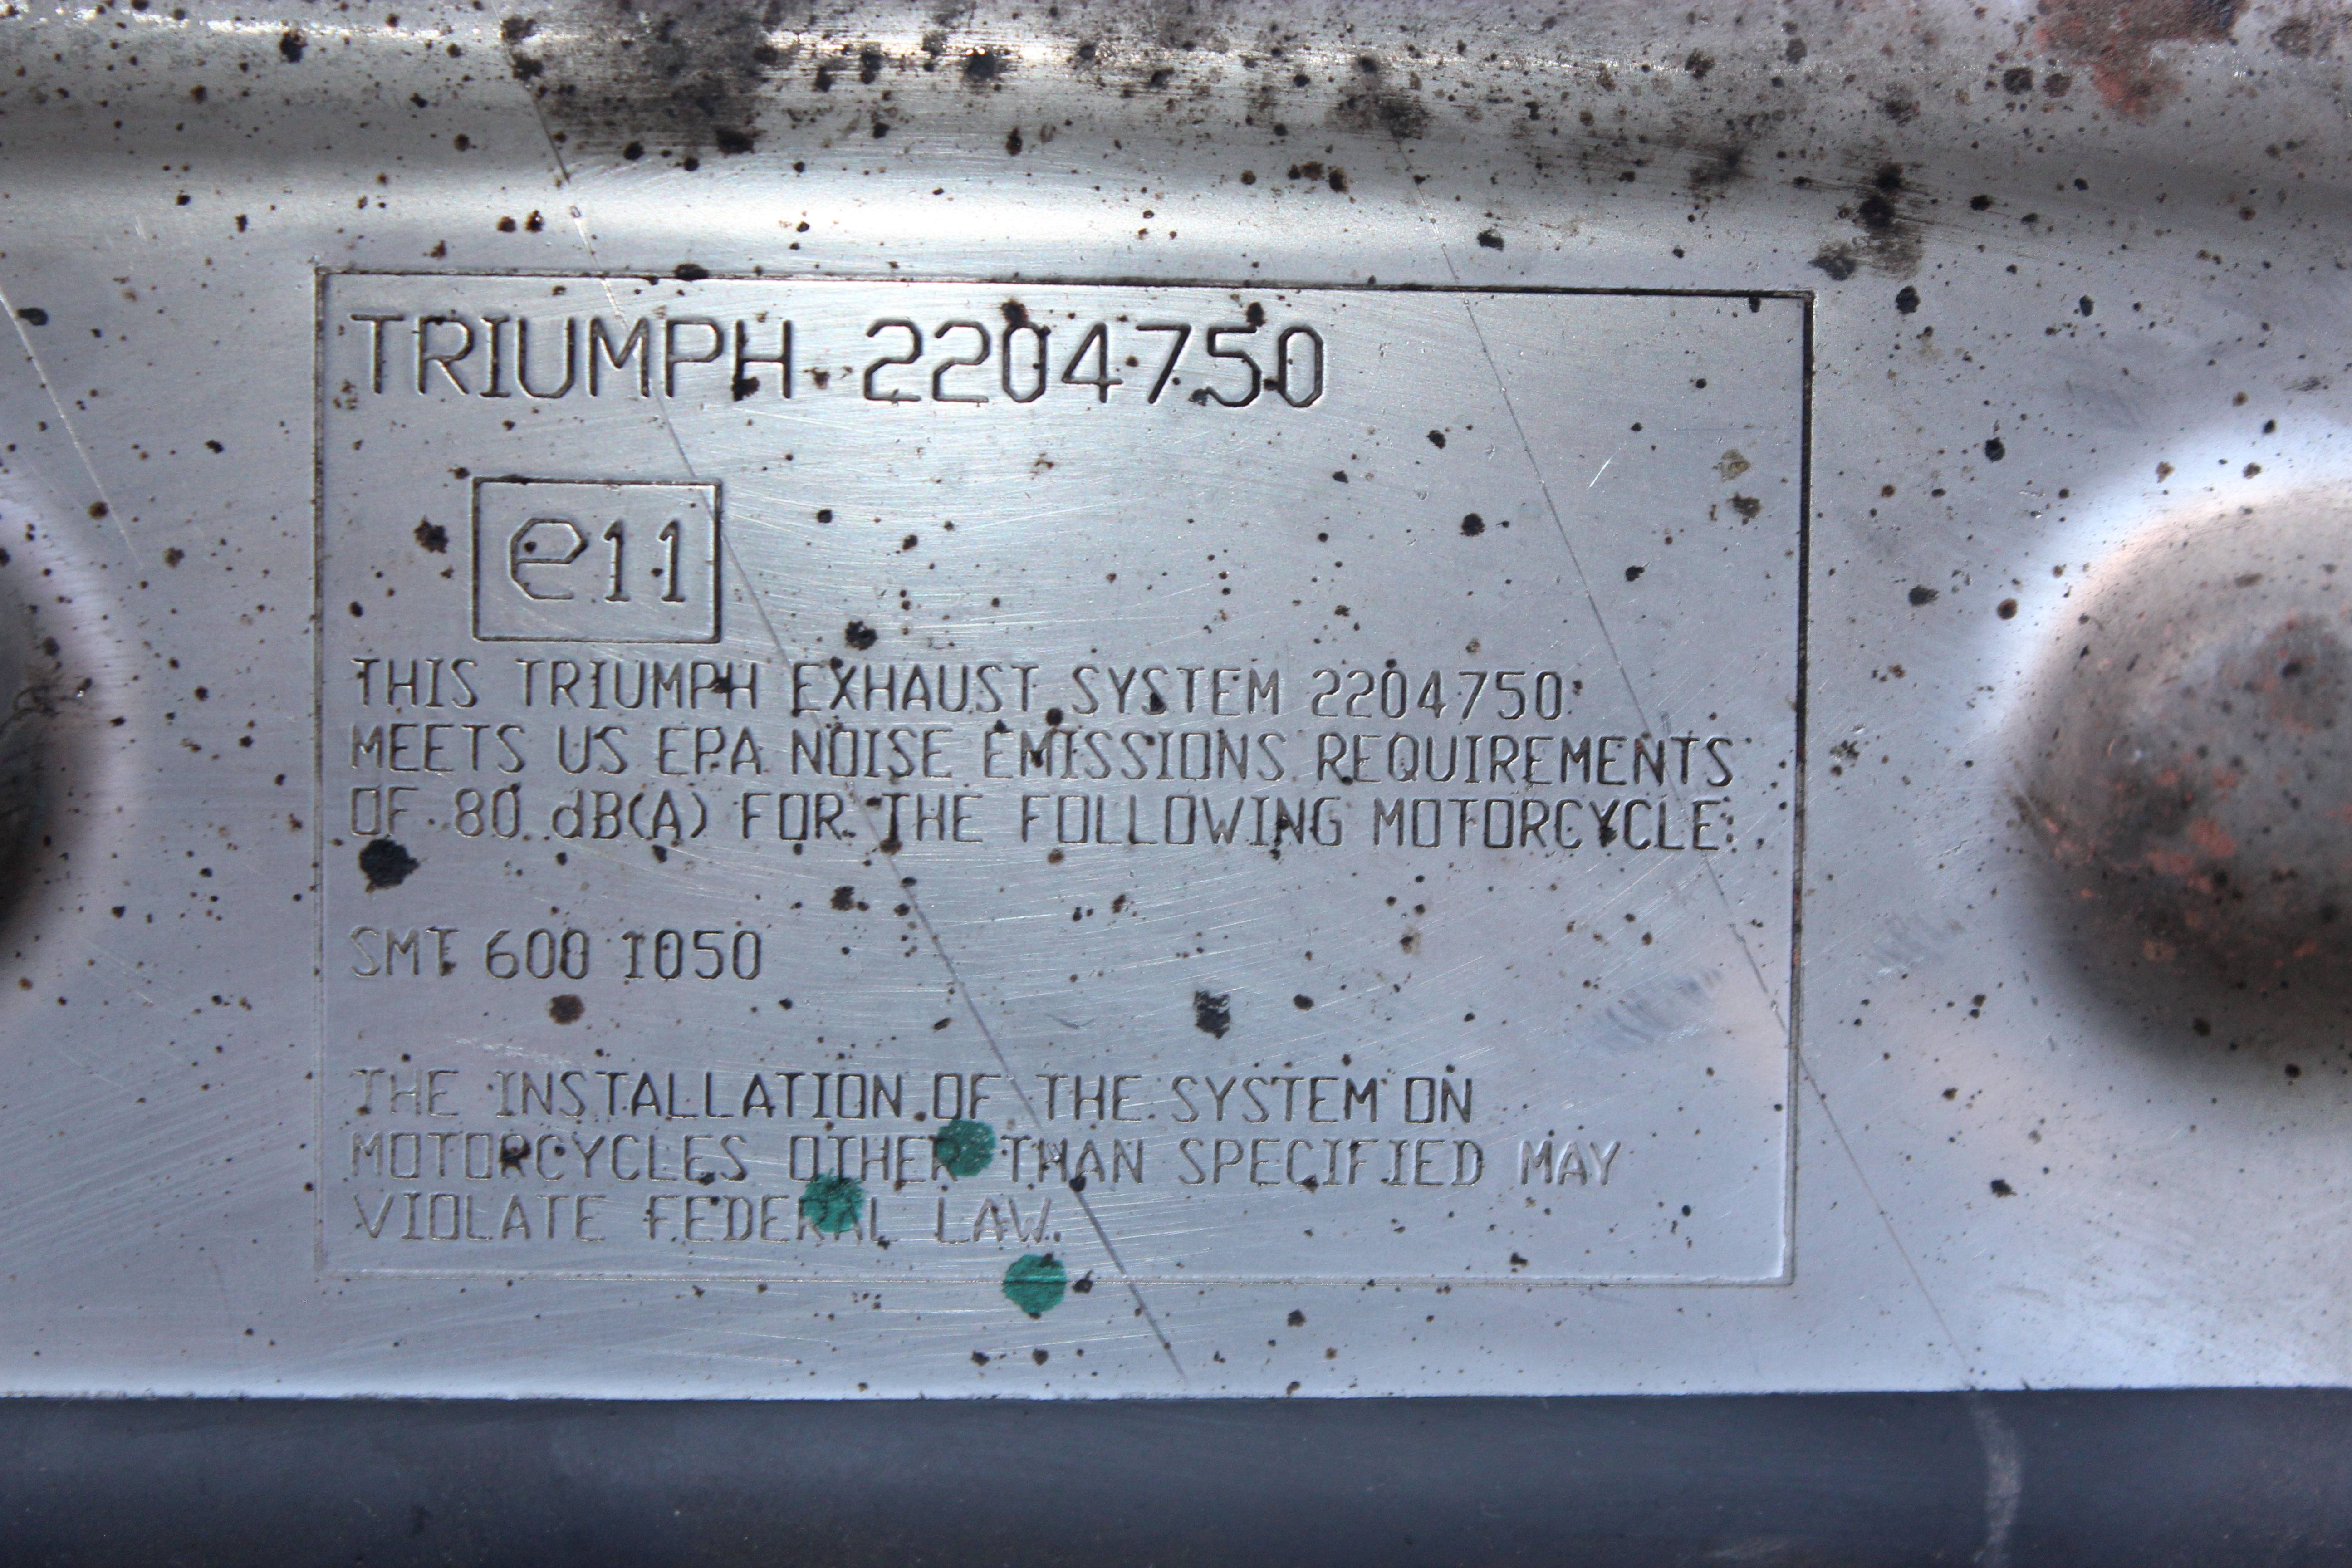
OEM part number
So the first step was to drill out the stainless lugs that hold the baffles in place, I purchased a 8mm cobalt drill bit for this job as most of my bits are either blunt or burnt. In hindsight i should have got a 12mm bit as the 8mm didn’t quite remove all of the lug, resulting in me having to dremel the remaining bit out.
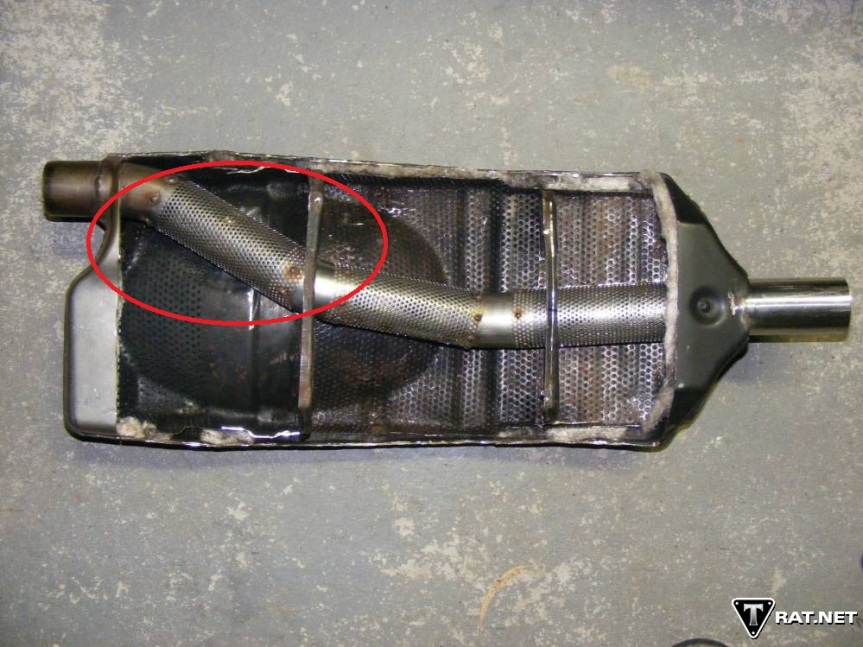
Cobalt drill bit oil to lube the bit and a pot of water to keep the drill bit as cool as possible. There are only the six rivets to drill out on the top, circled in red.
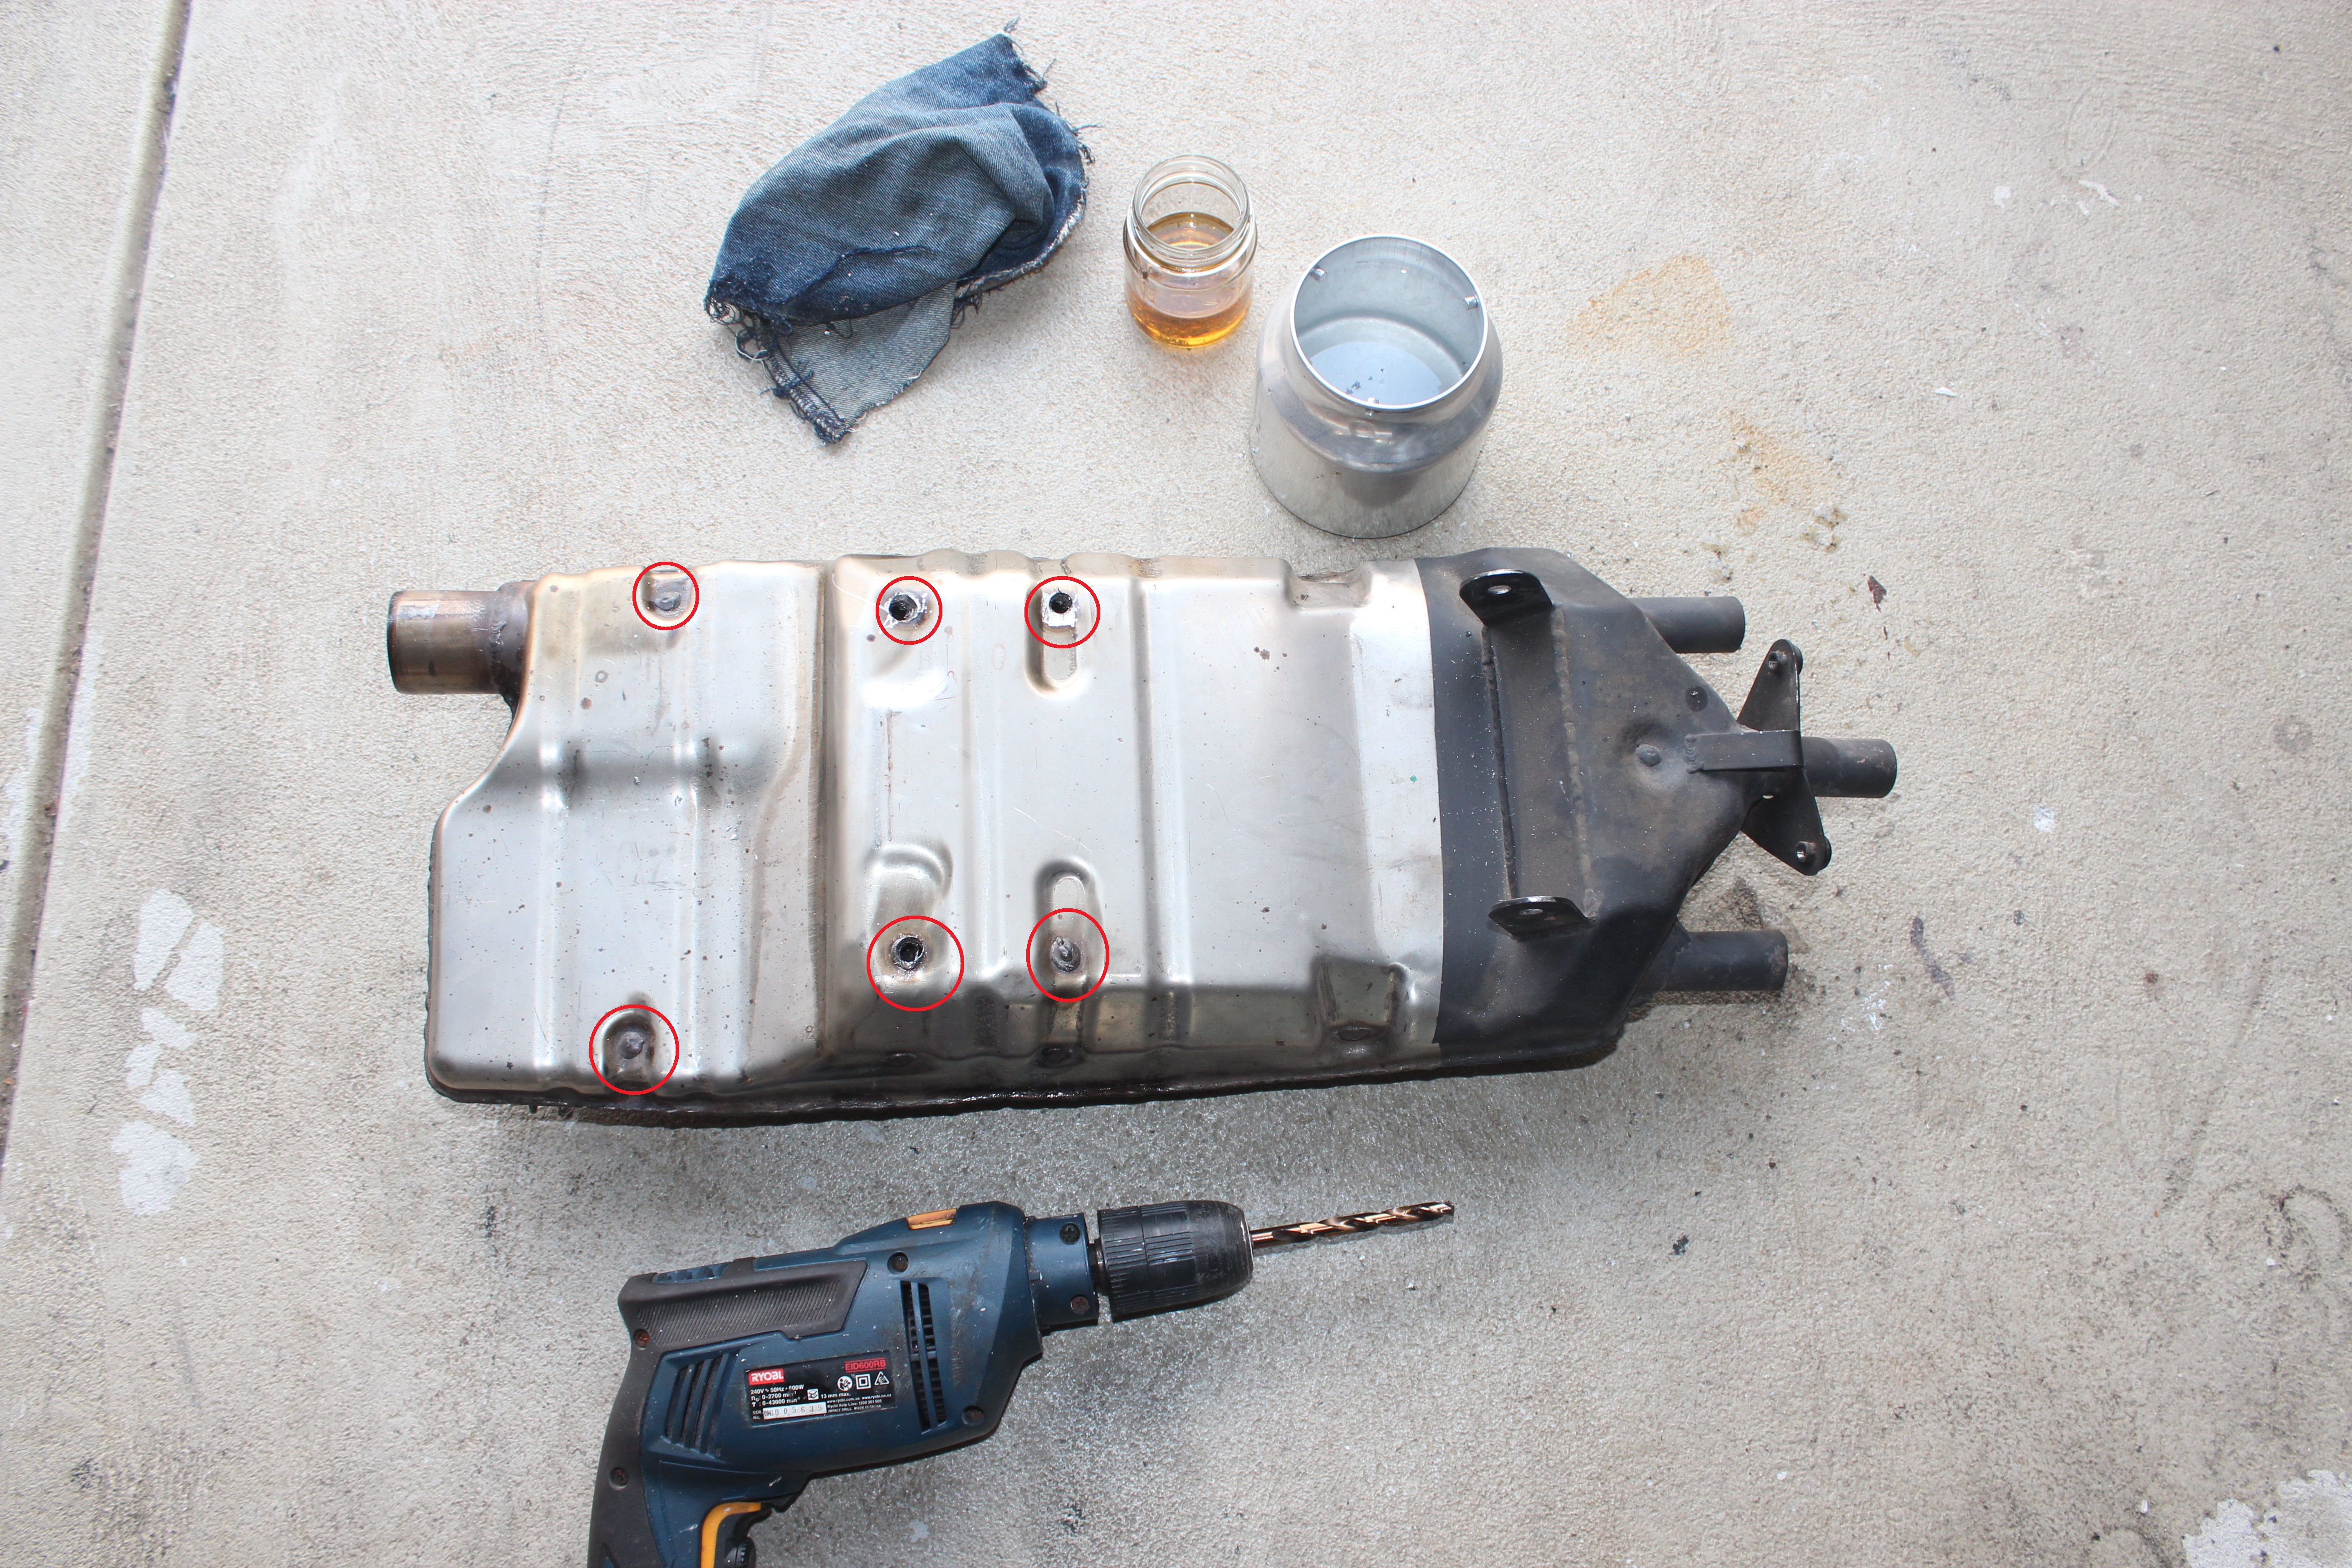
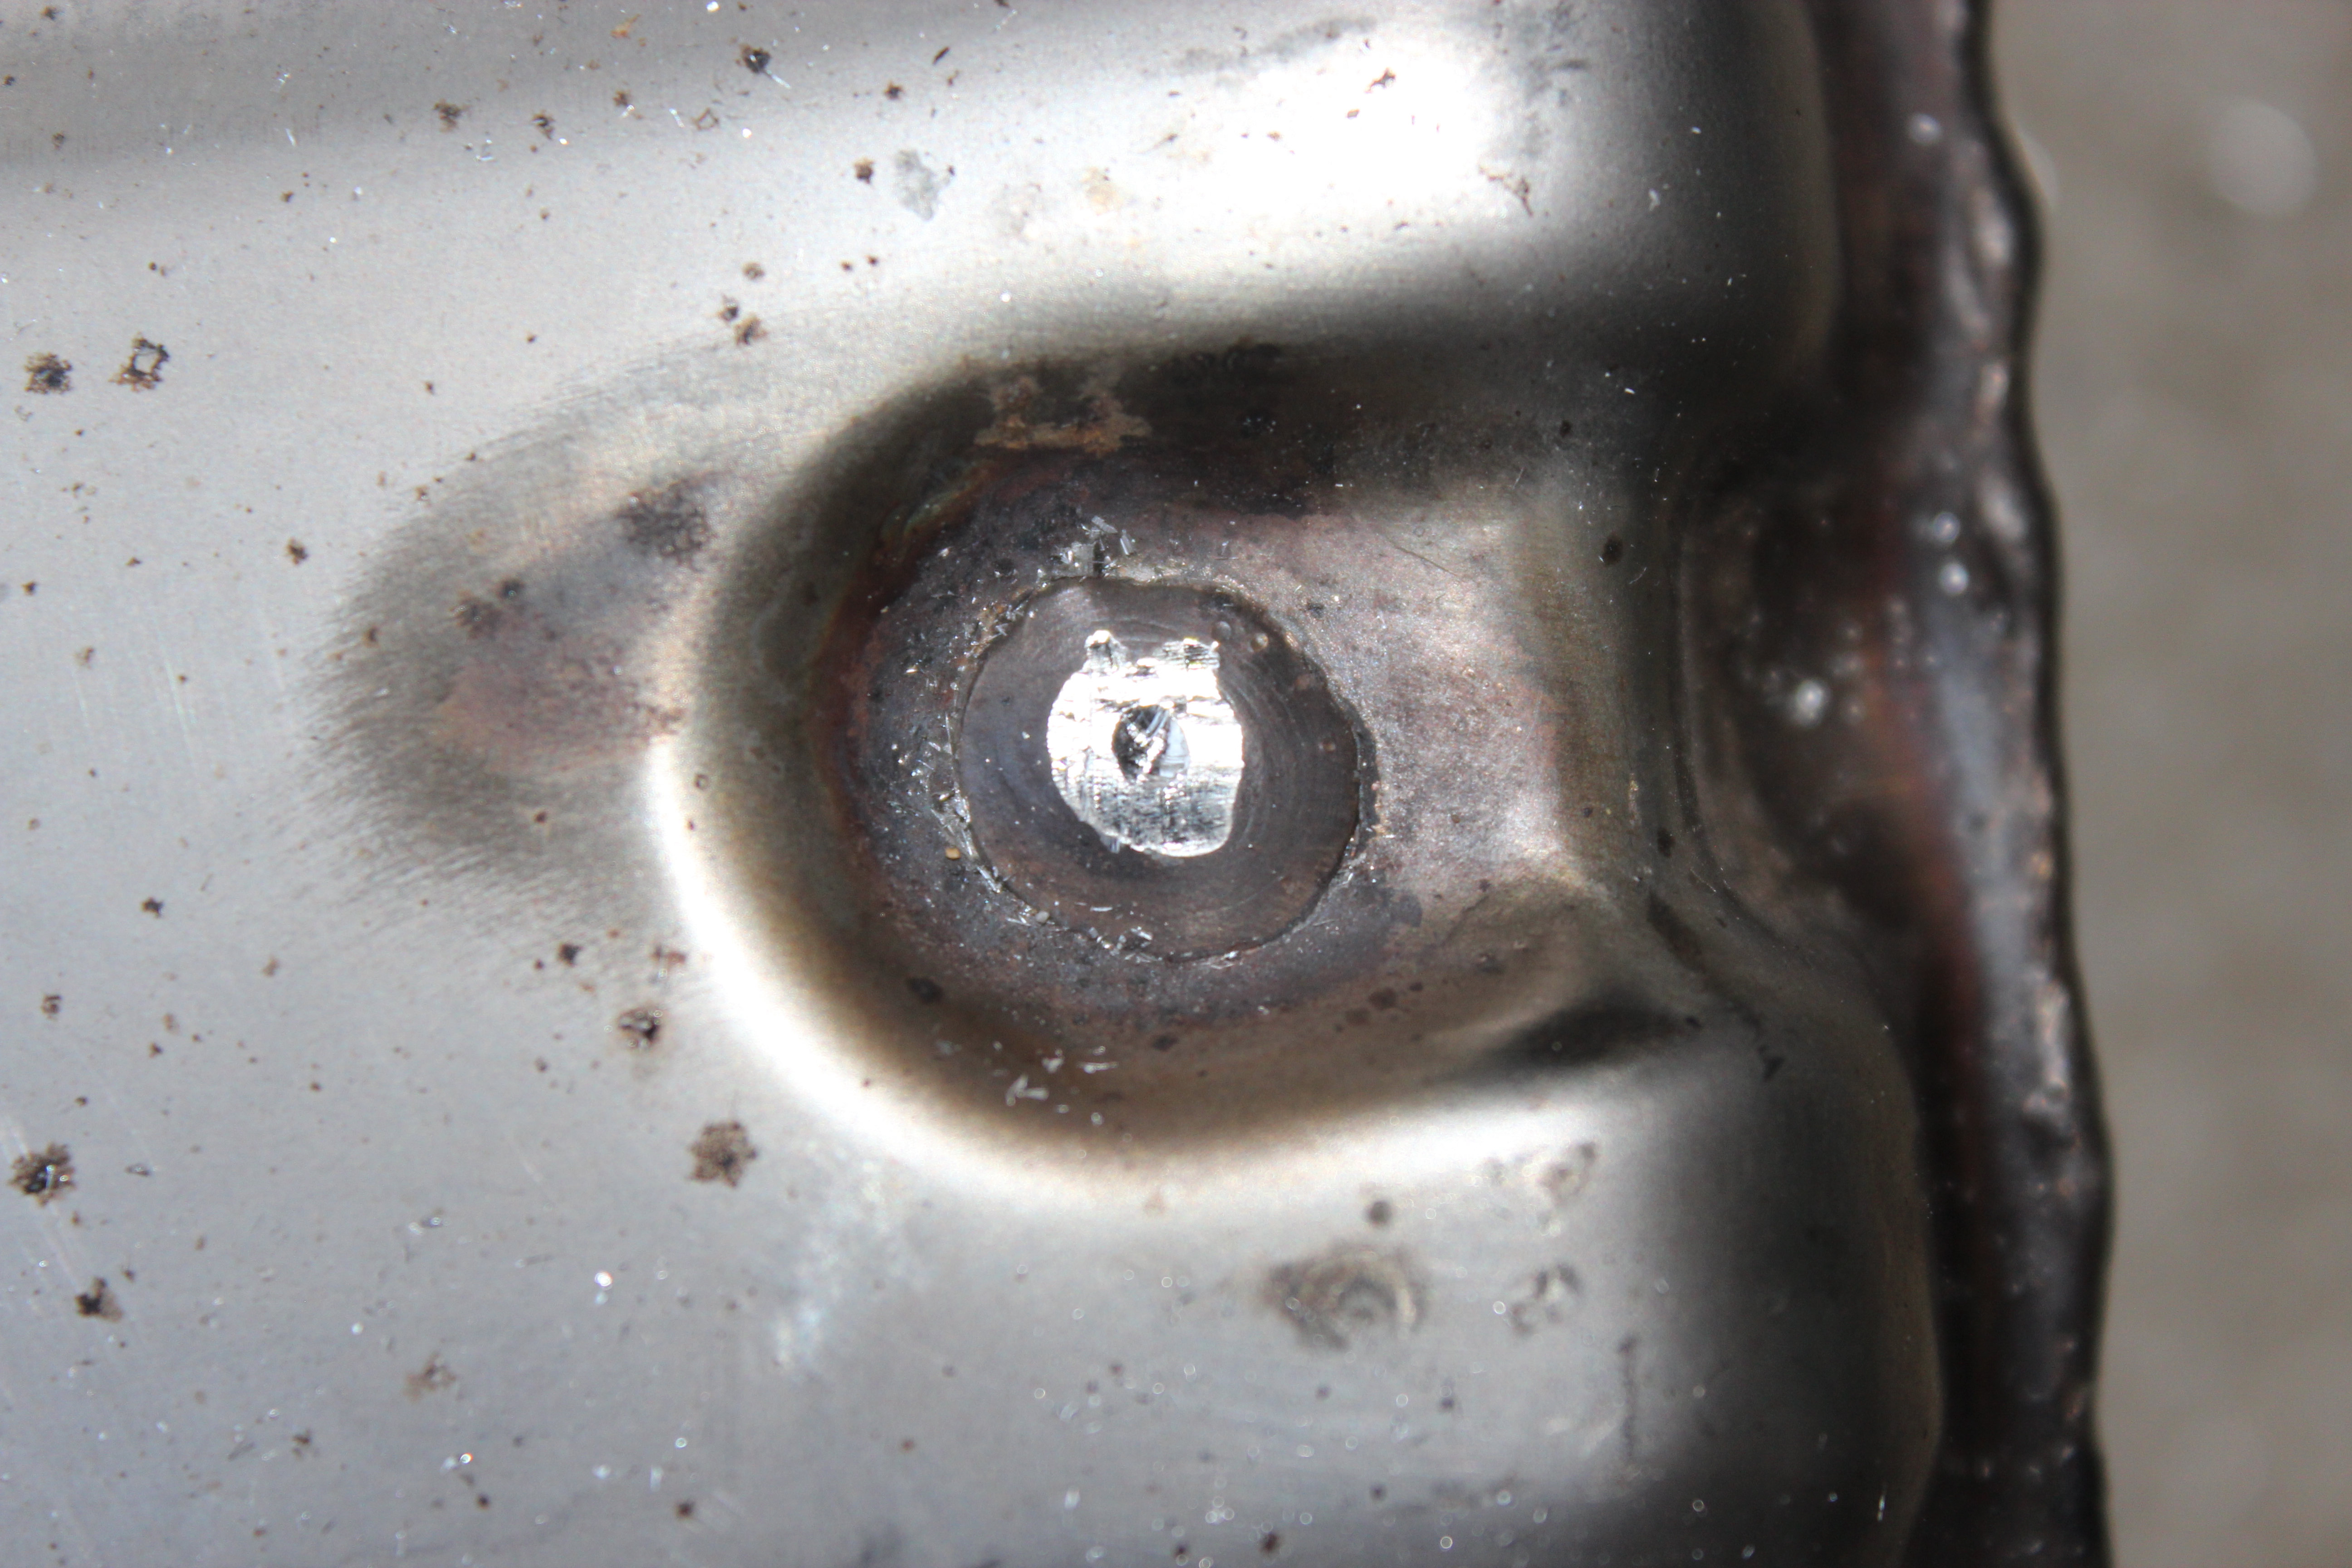
Drilling the rivets out was bloody hard, as you can see in the previous picture the welds are uneven, so I flattened the tops and drilled a small pilot.
Then slowly drilled them out keeping the drill bit as cool as possible and well lubed.
Then cut the top off, which reveled the lagging between the two layers.
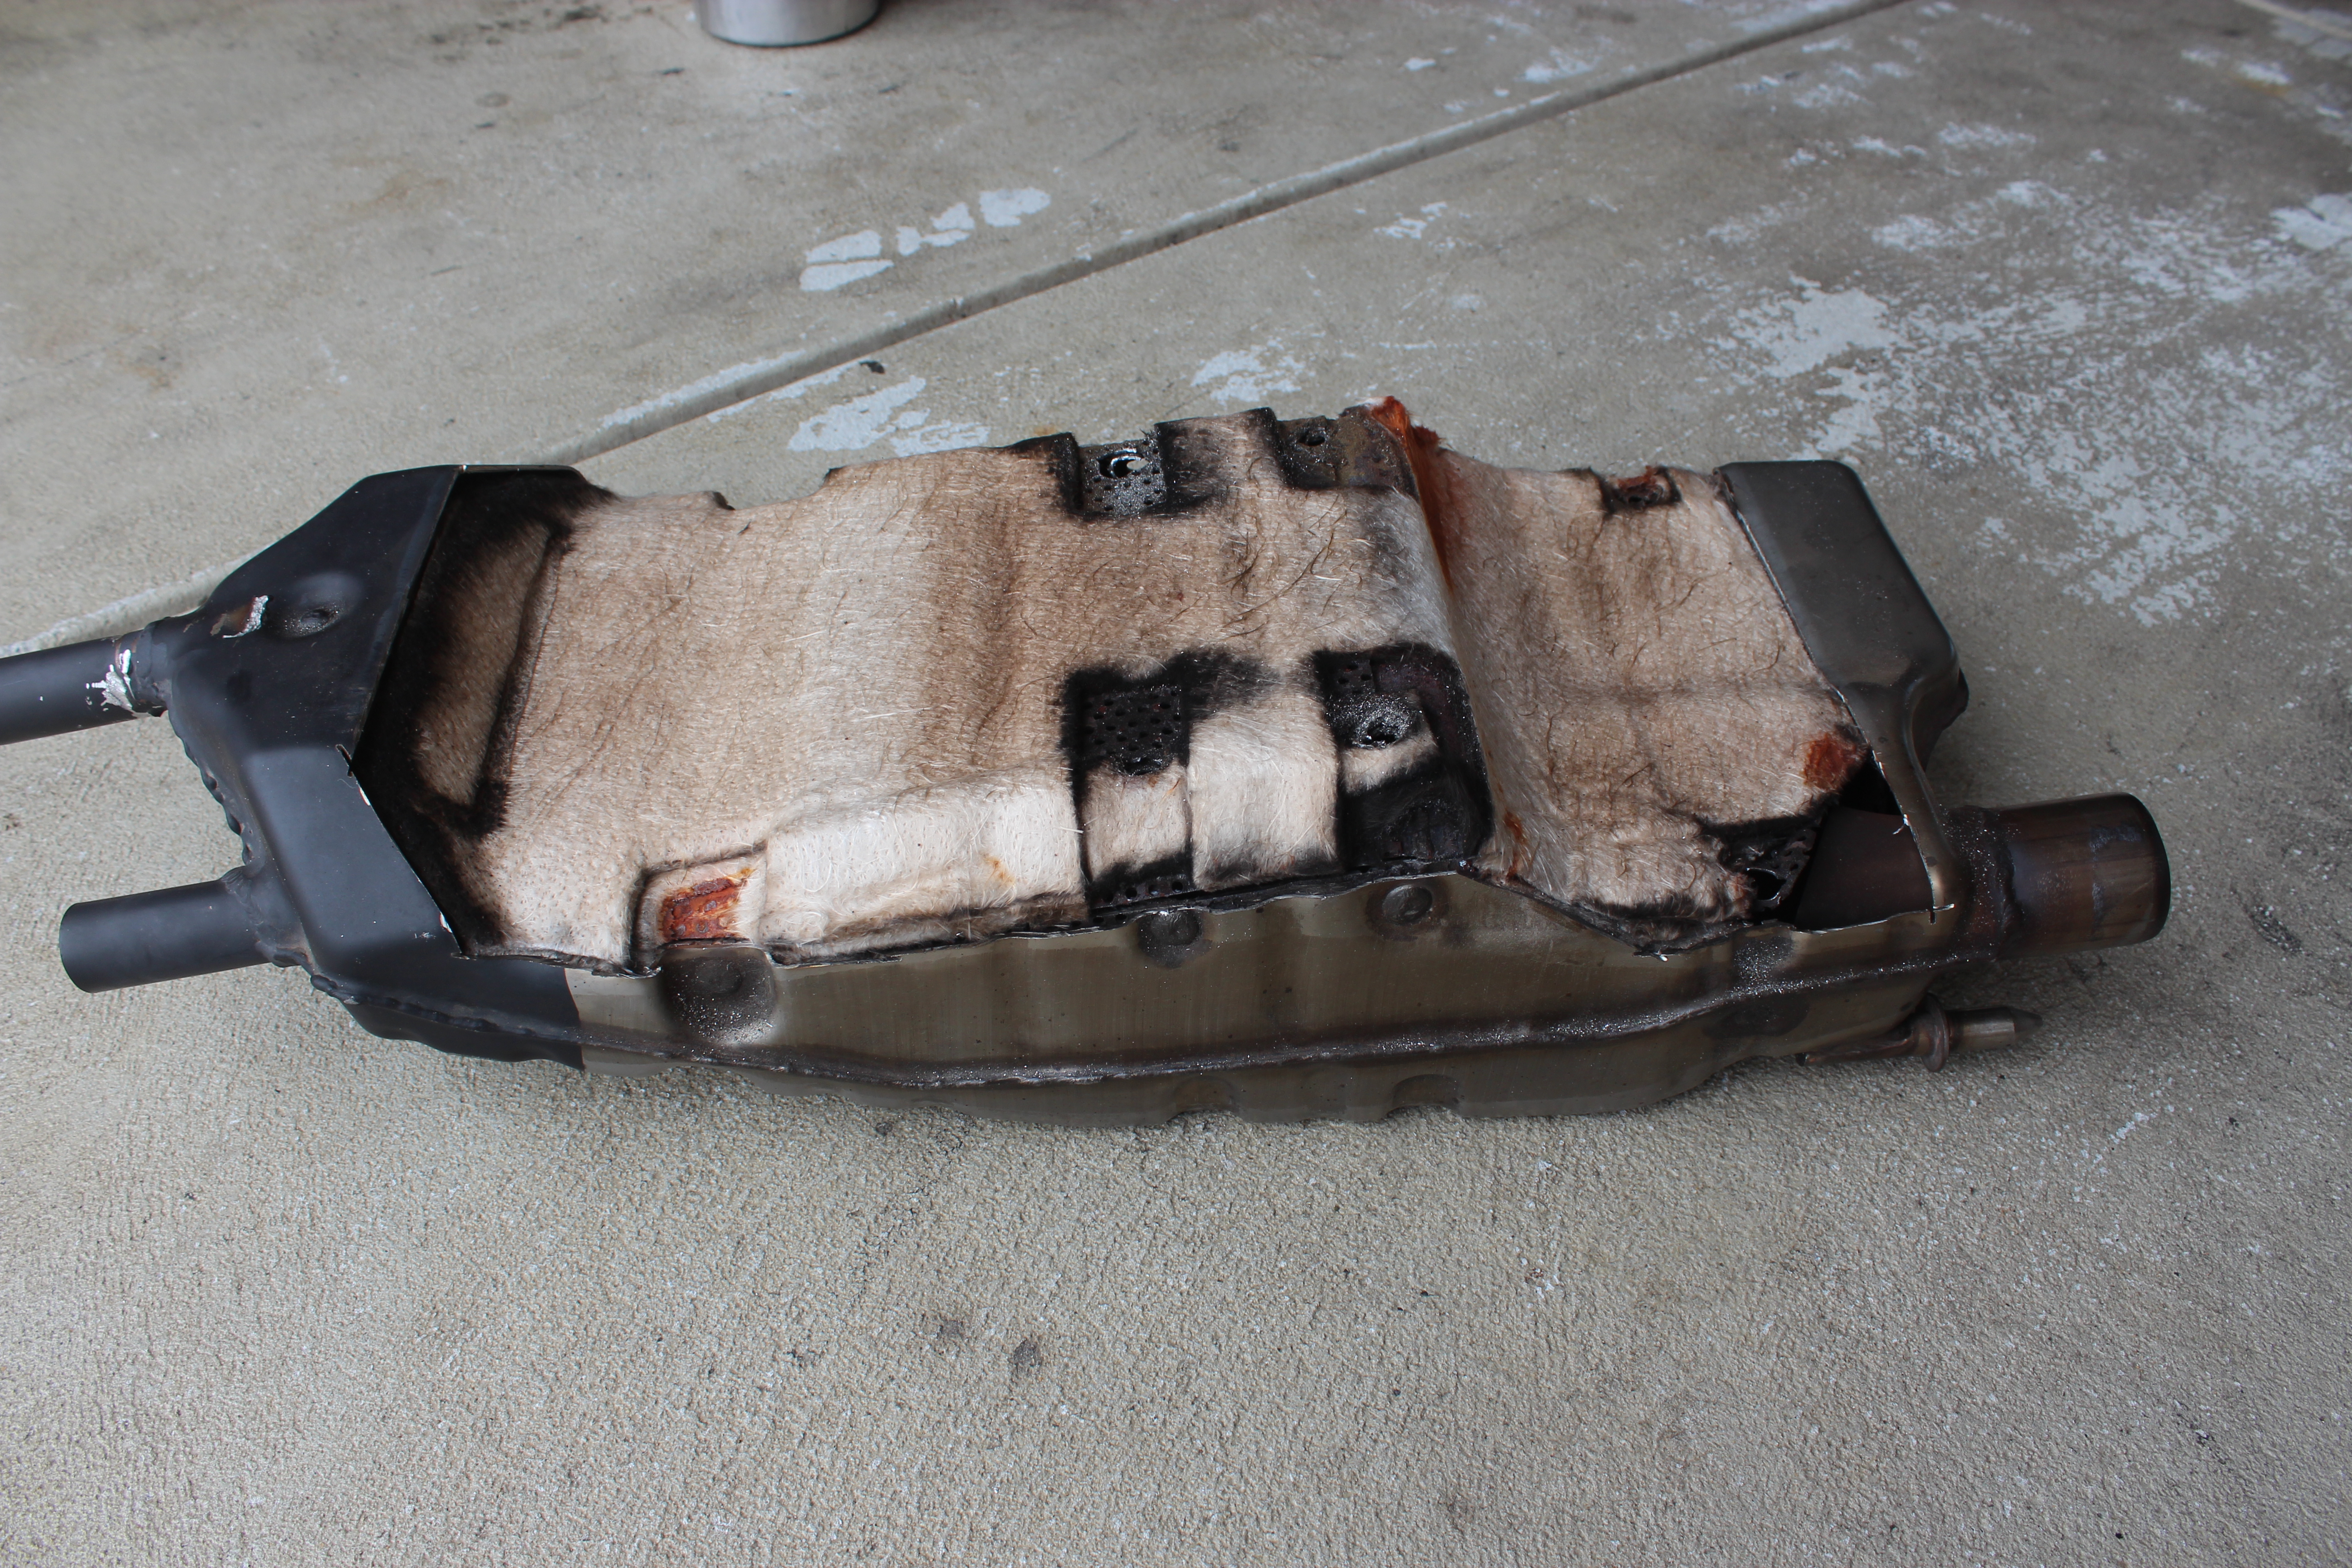
Take off the lagging and you’ll see the second skin which is perforated mild steel.
After cutting the sides I realized this piece is also tack welded in eight places on the top.
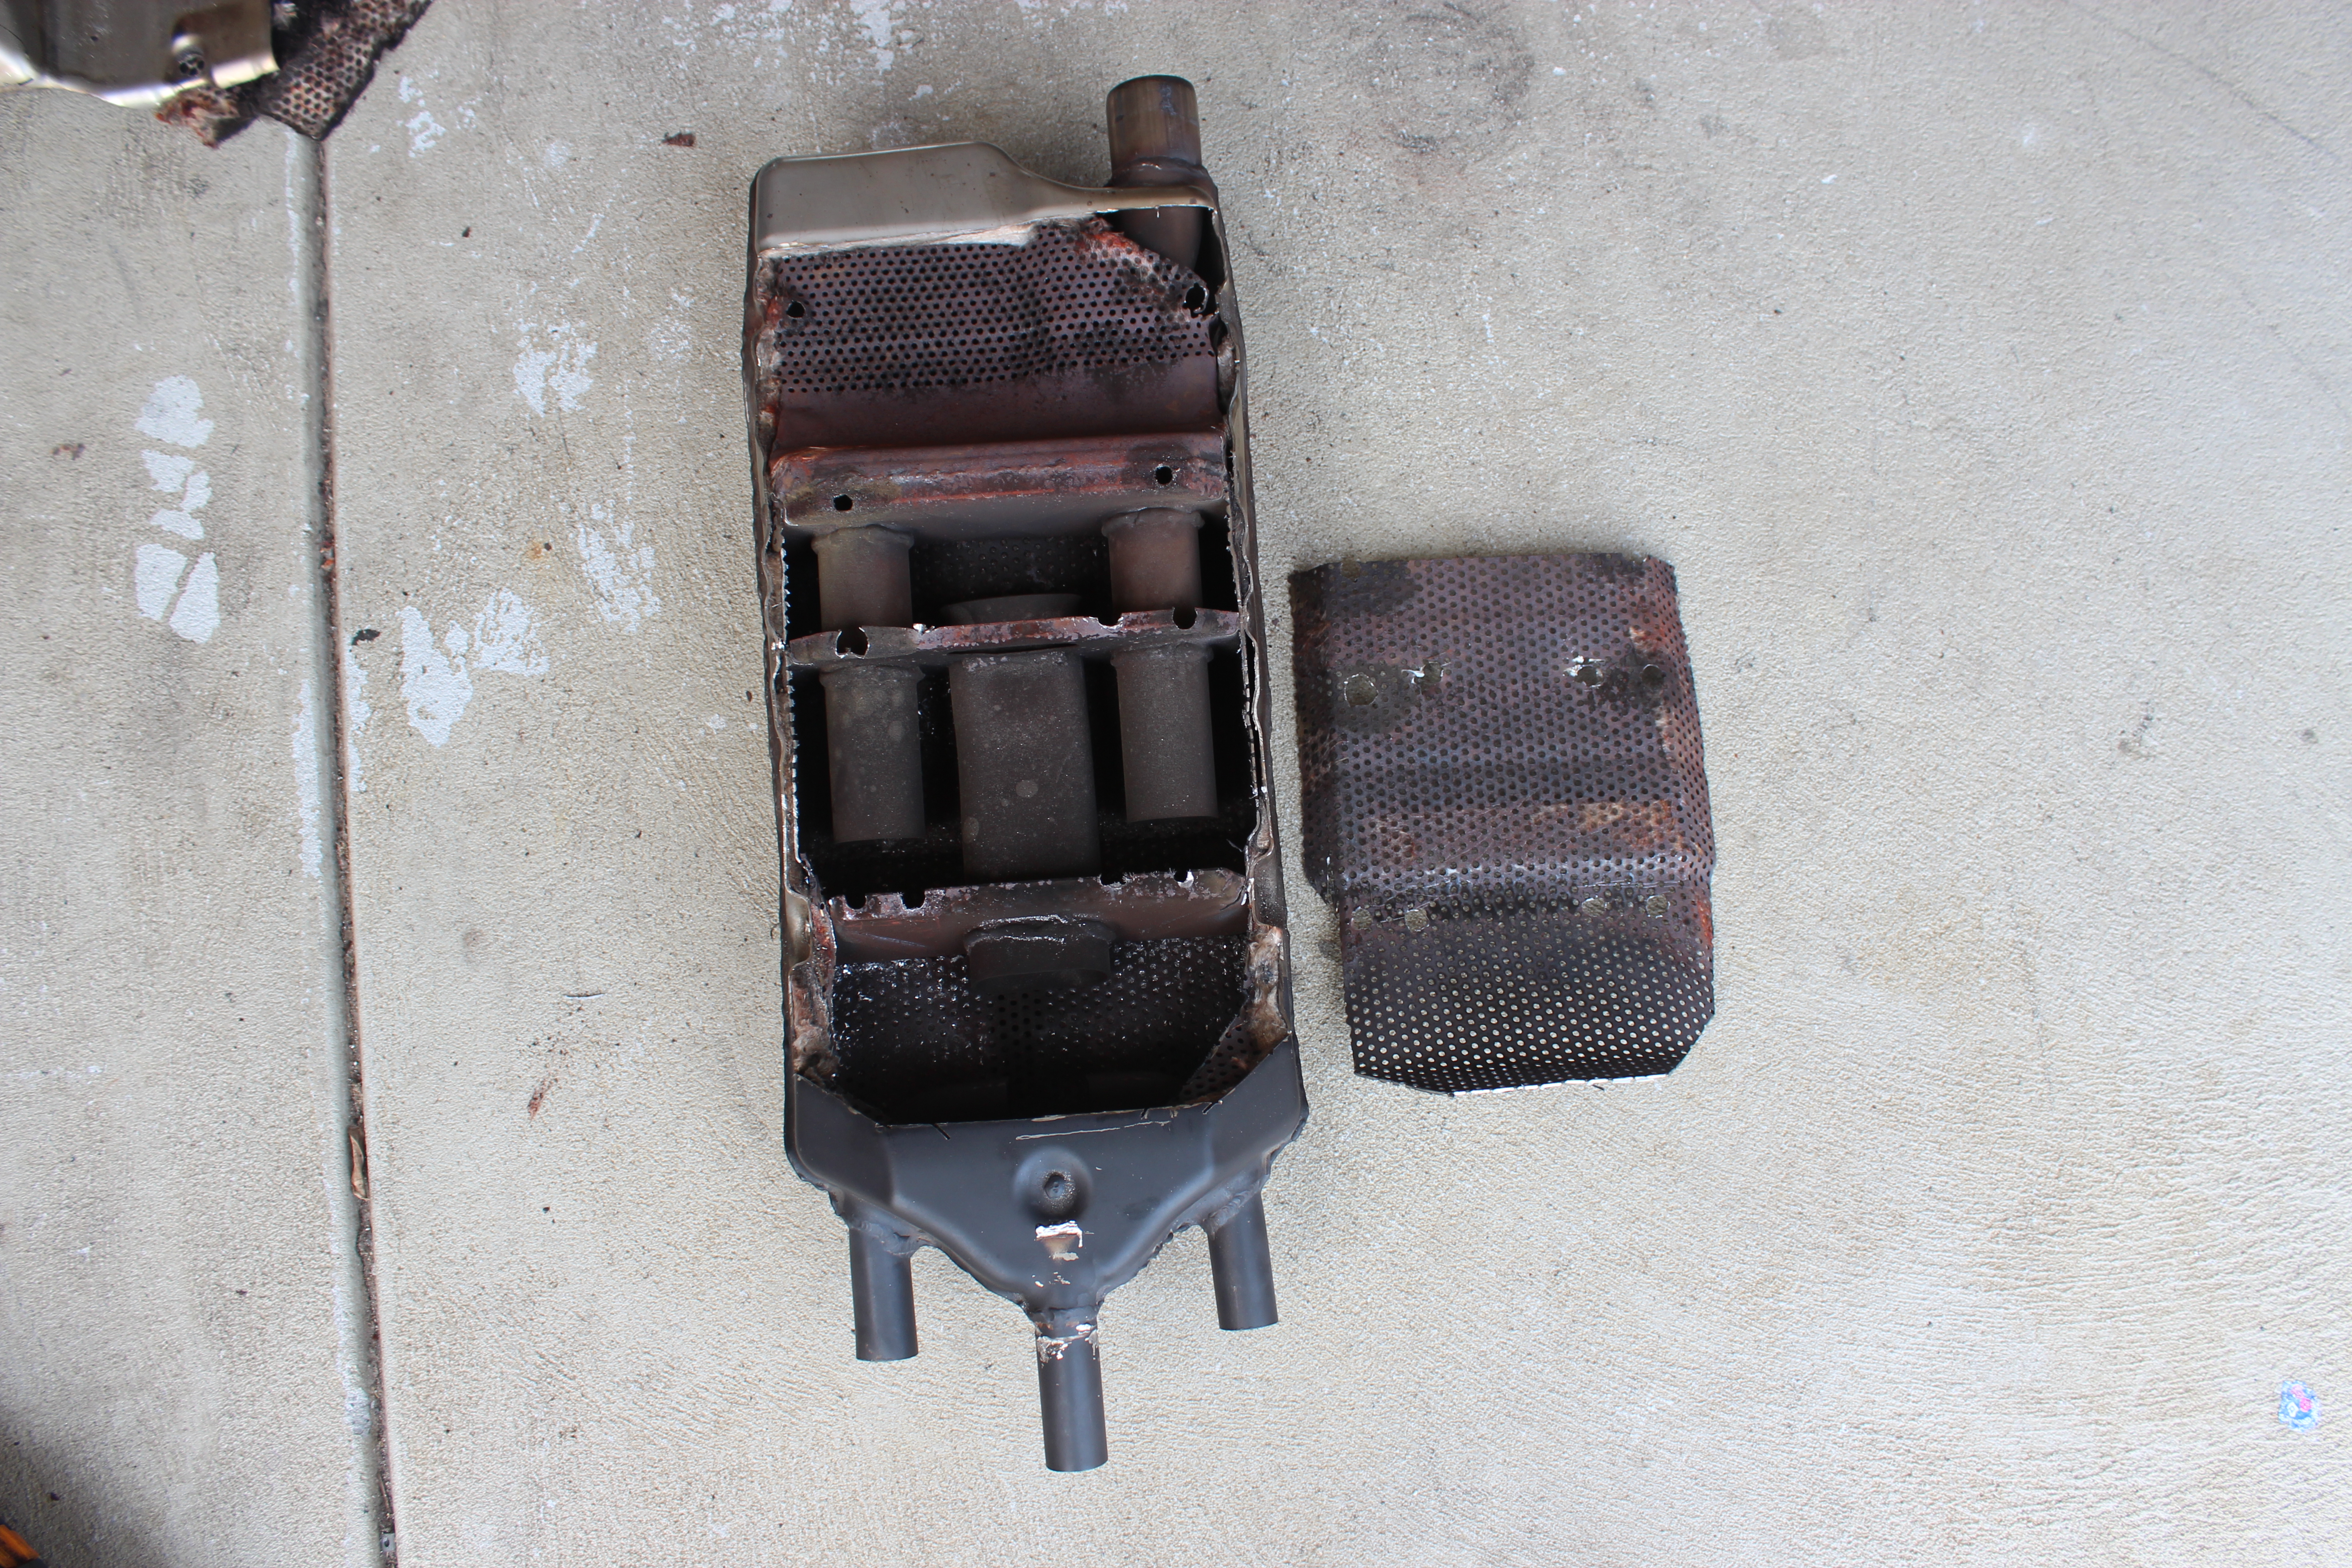
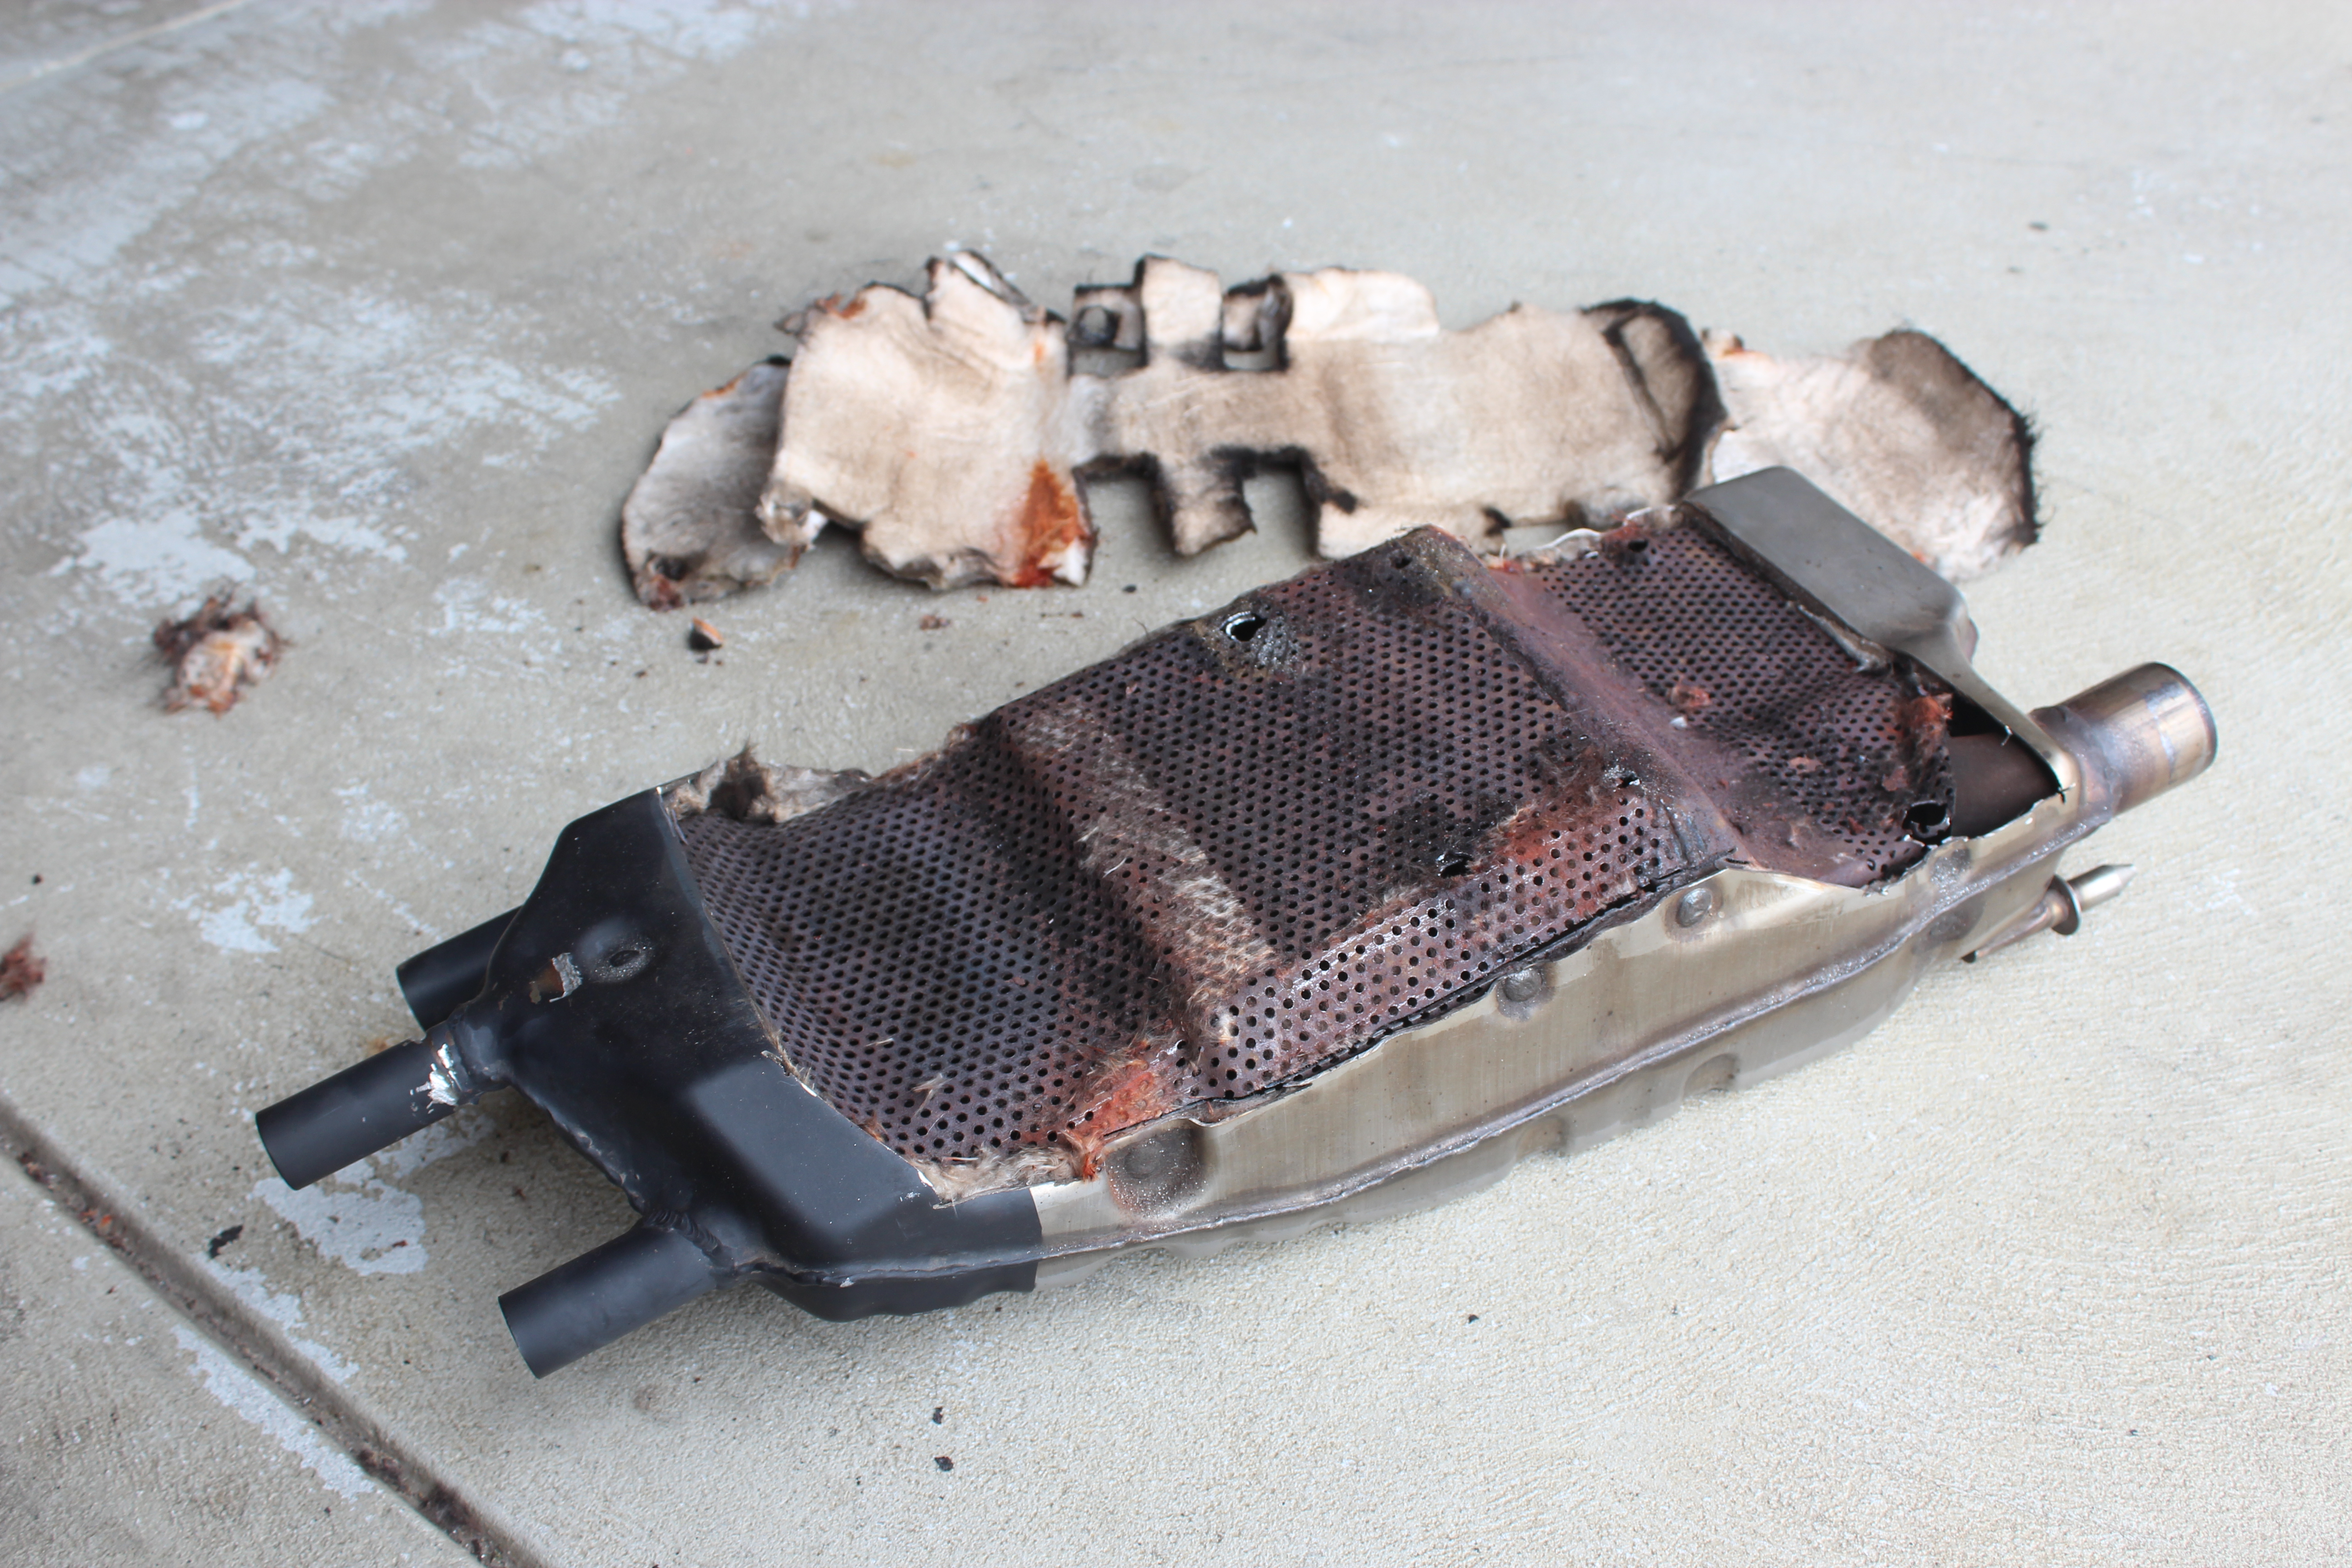
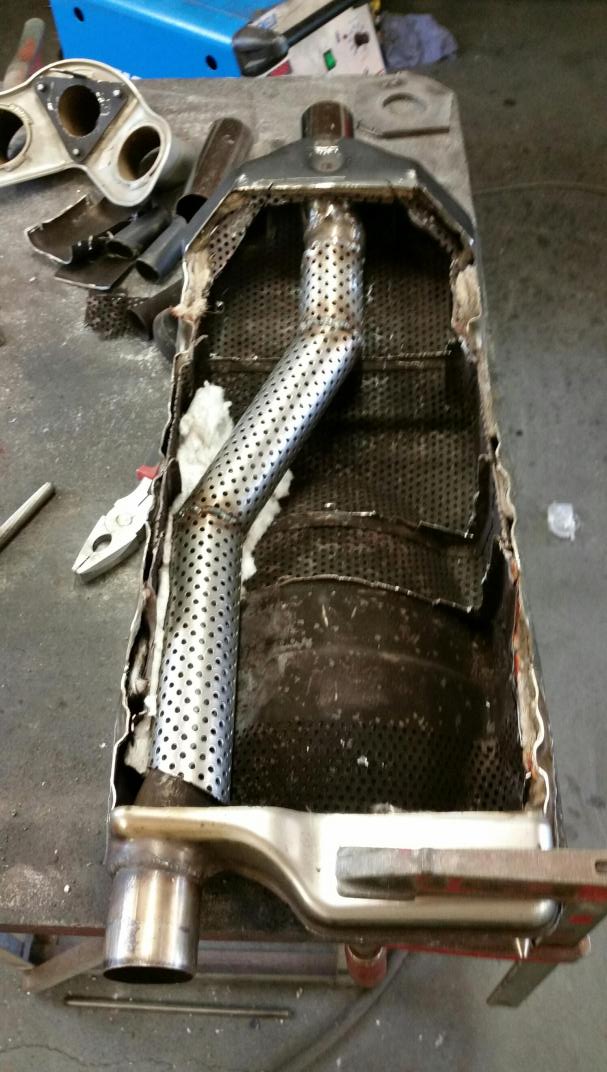
Finally revealing the internals, which makes it abundantly clear why the bike is so quiet.
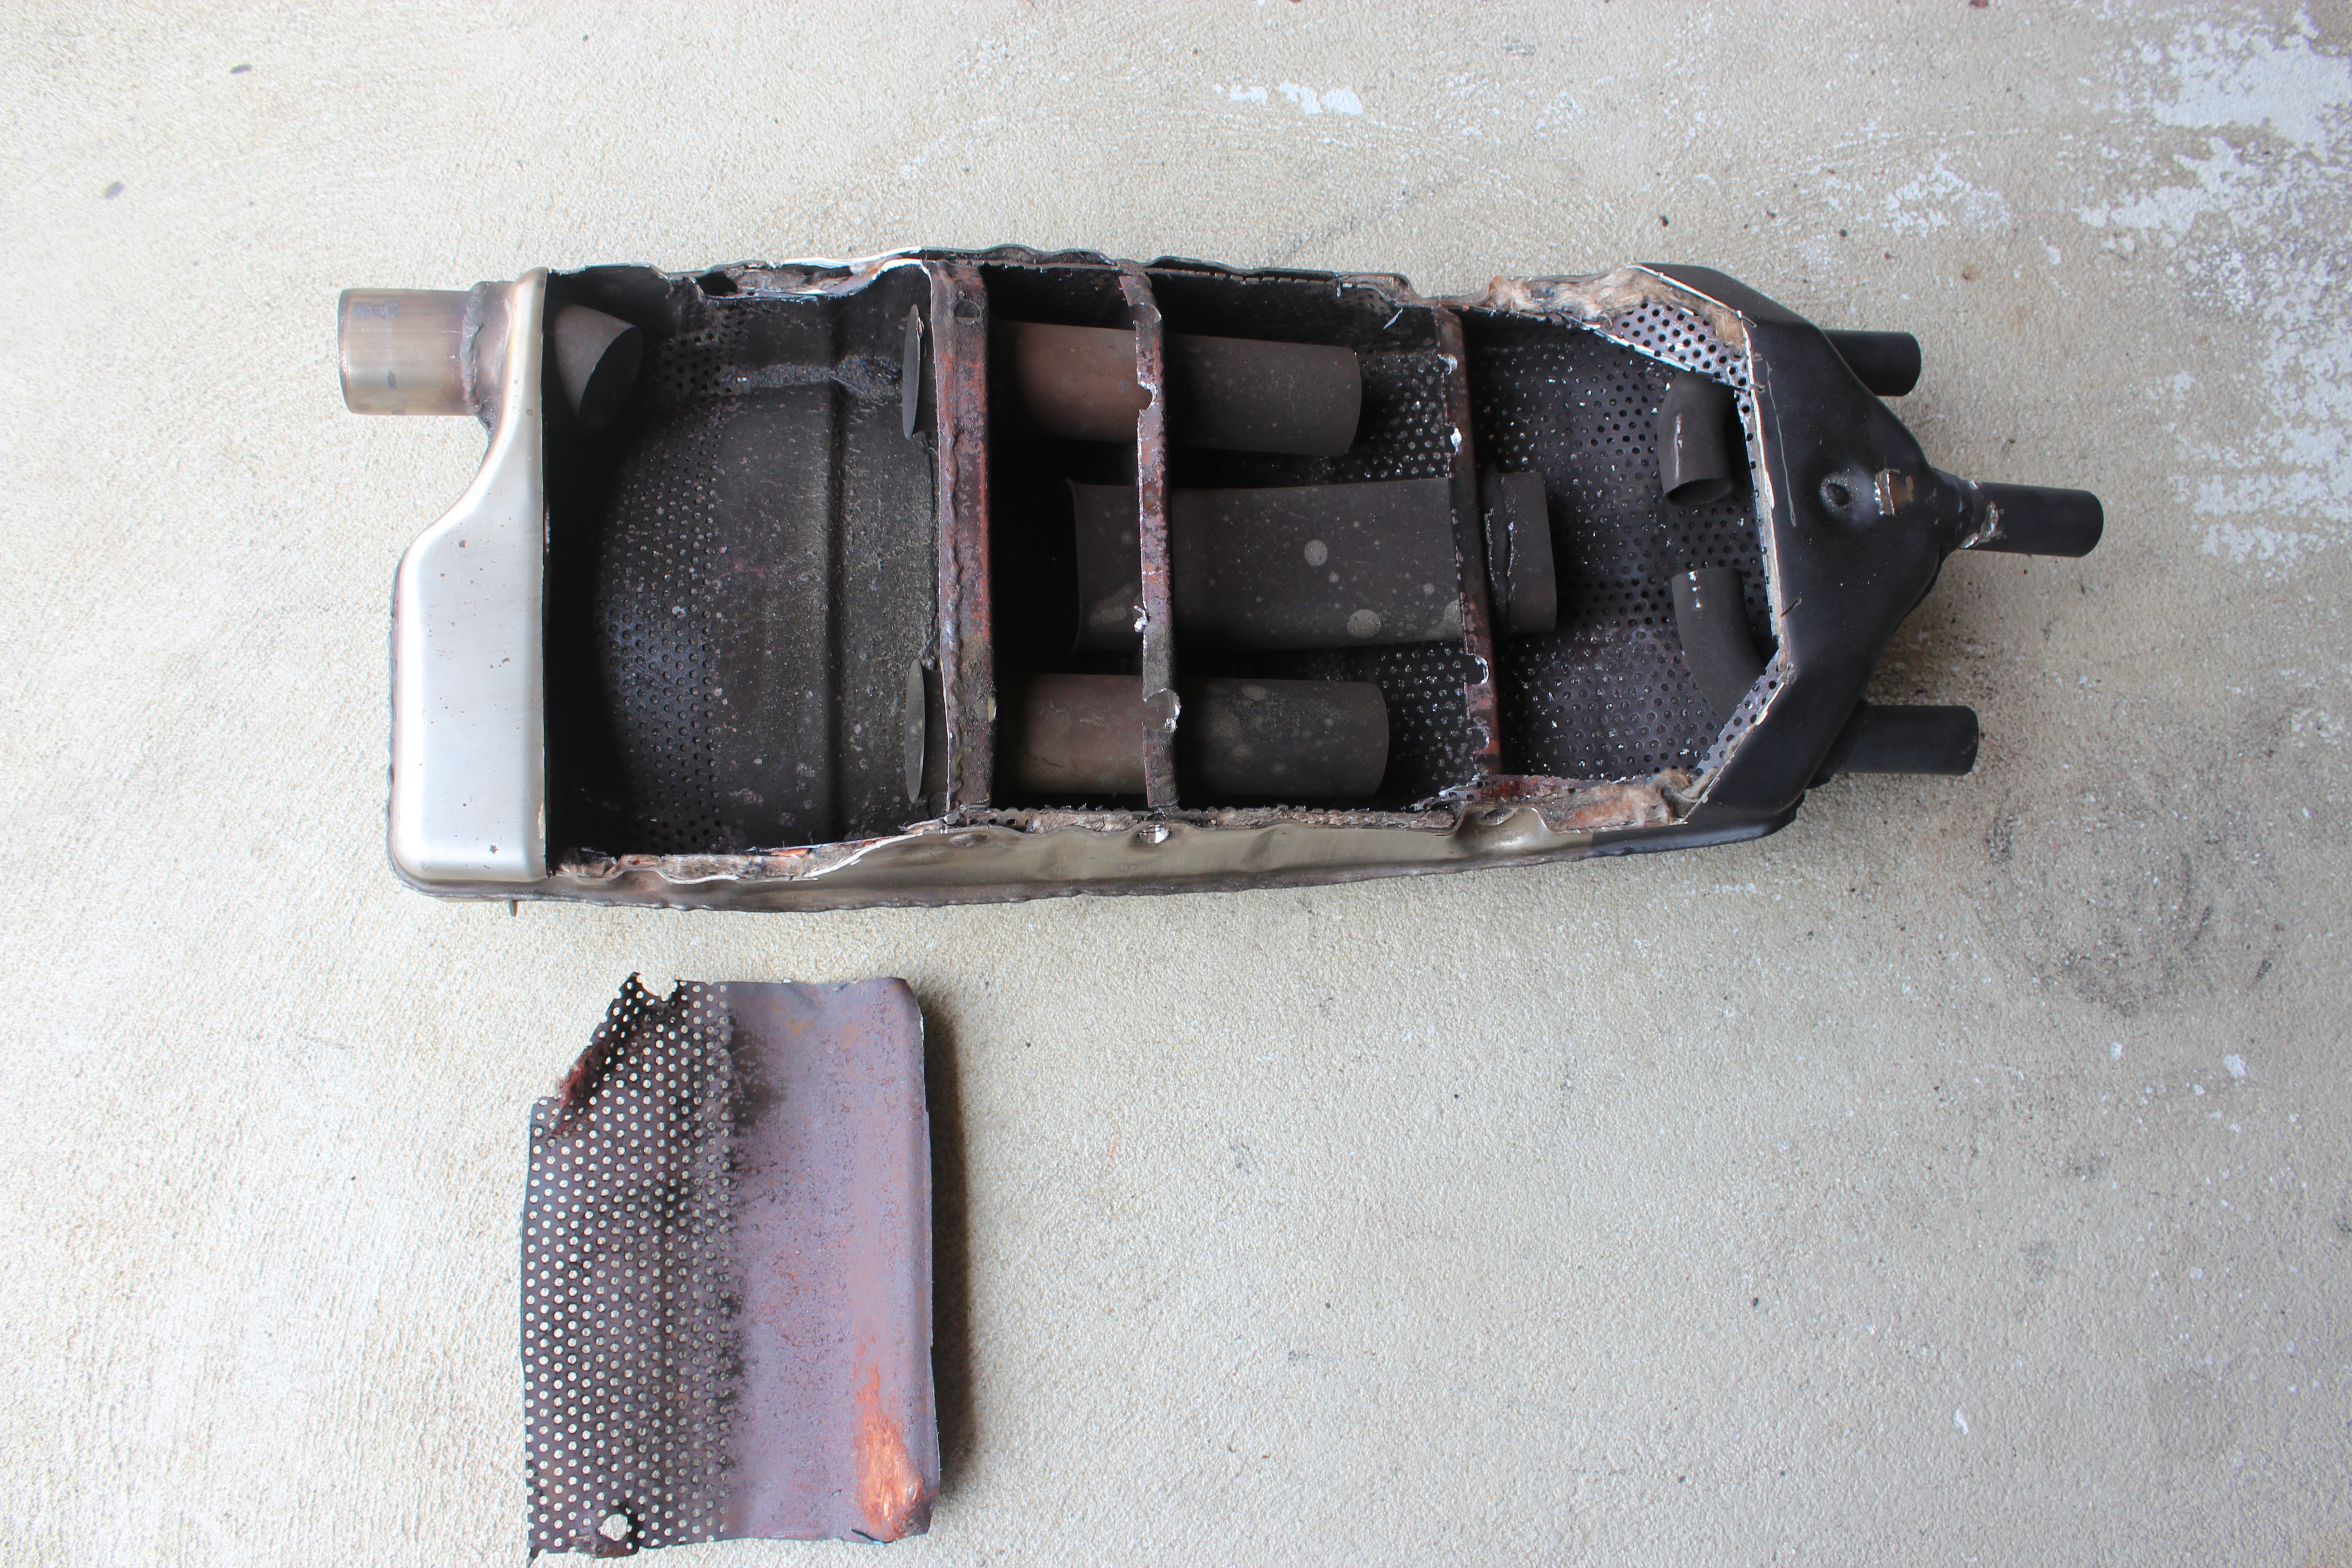
The next stage was to gut the muffler. This was quite straight forward, basically taking to it with a series of cutting/grinding implements.
I also cut the small pipes off and opened the center hole to fit a full size pipe. (unfortunately there’s no photo of the larger hole but i guess we all have a good idea of what a larger hole would look like).


This is the part where I had to hand over to my mate Darren for the welding, I’ve never welded stainless steel, its quite thin too at 1.3 mm and I almost certainly would have blown huge holes in it.
As we work on opposite shifts I only see Dazza for three days, so had to explain what I had in mind and leave the final internal pipe placement too him.
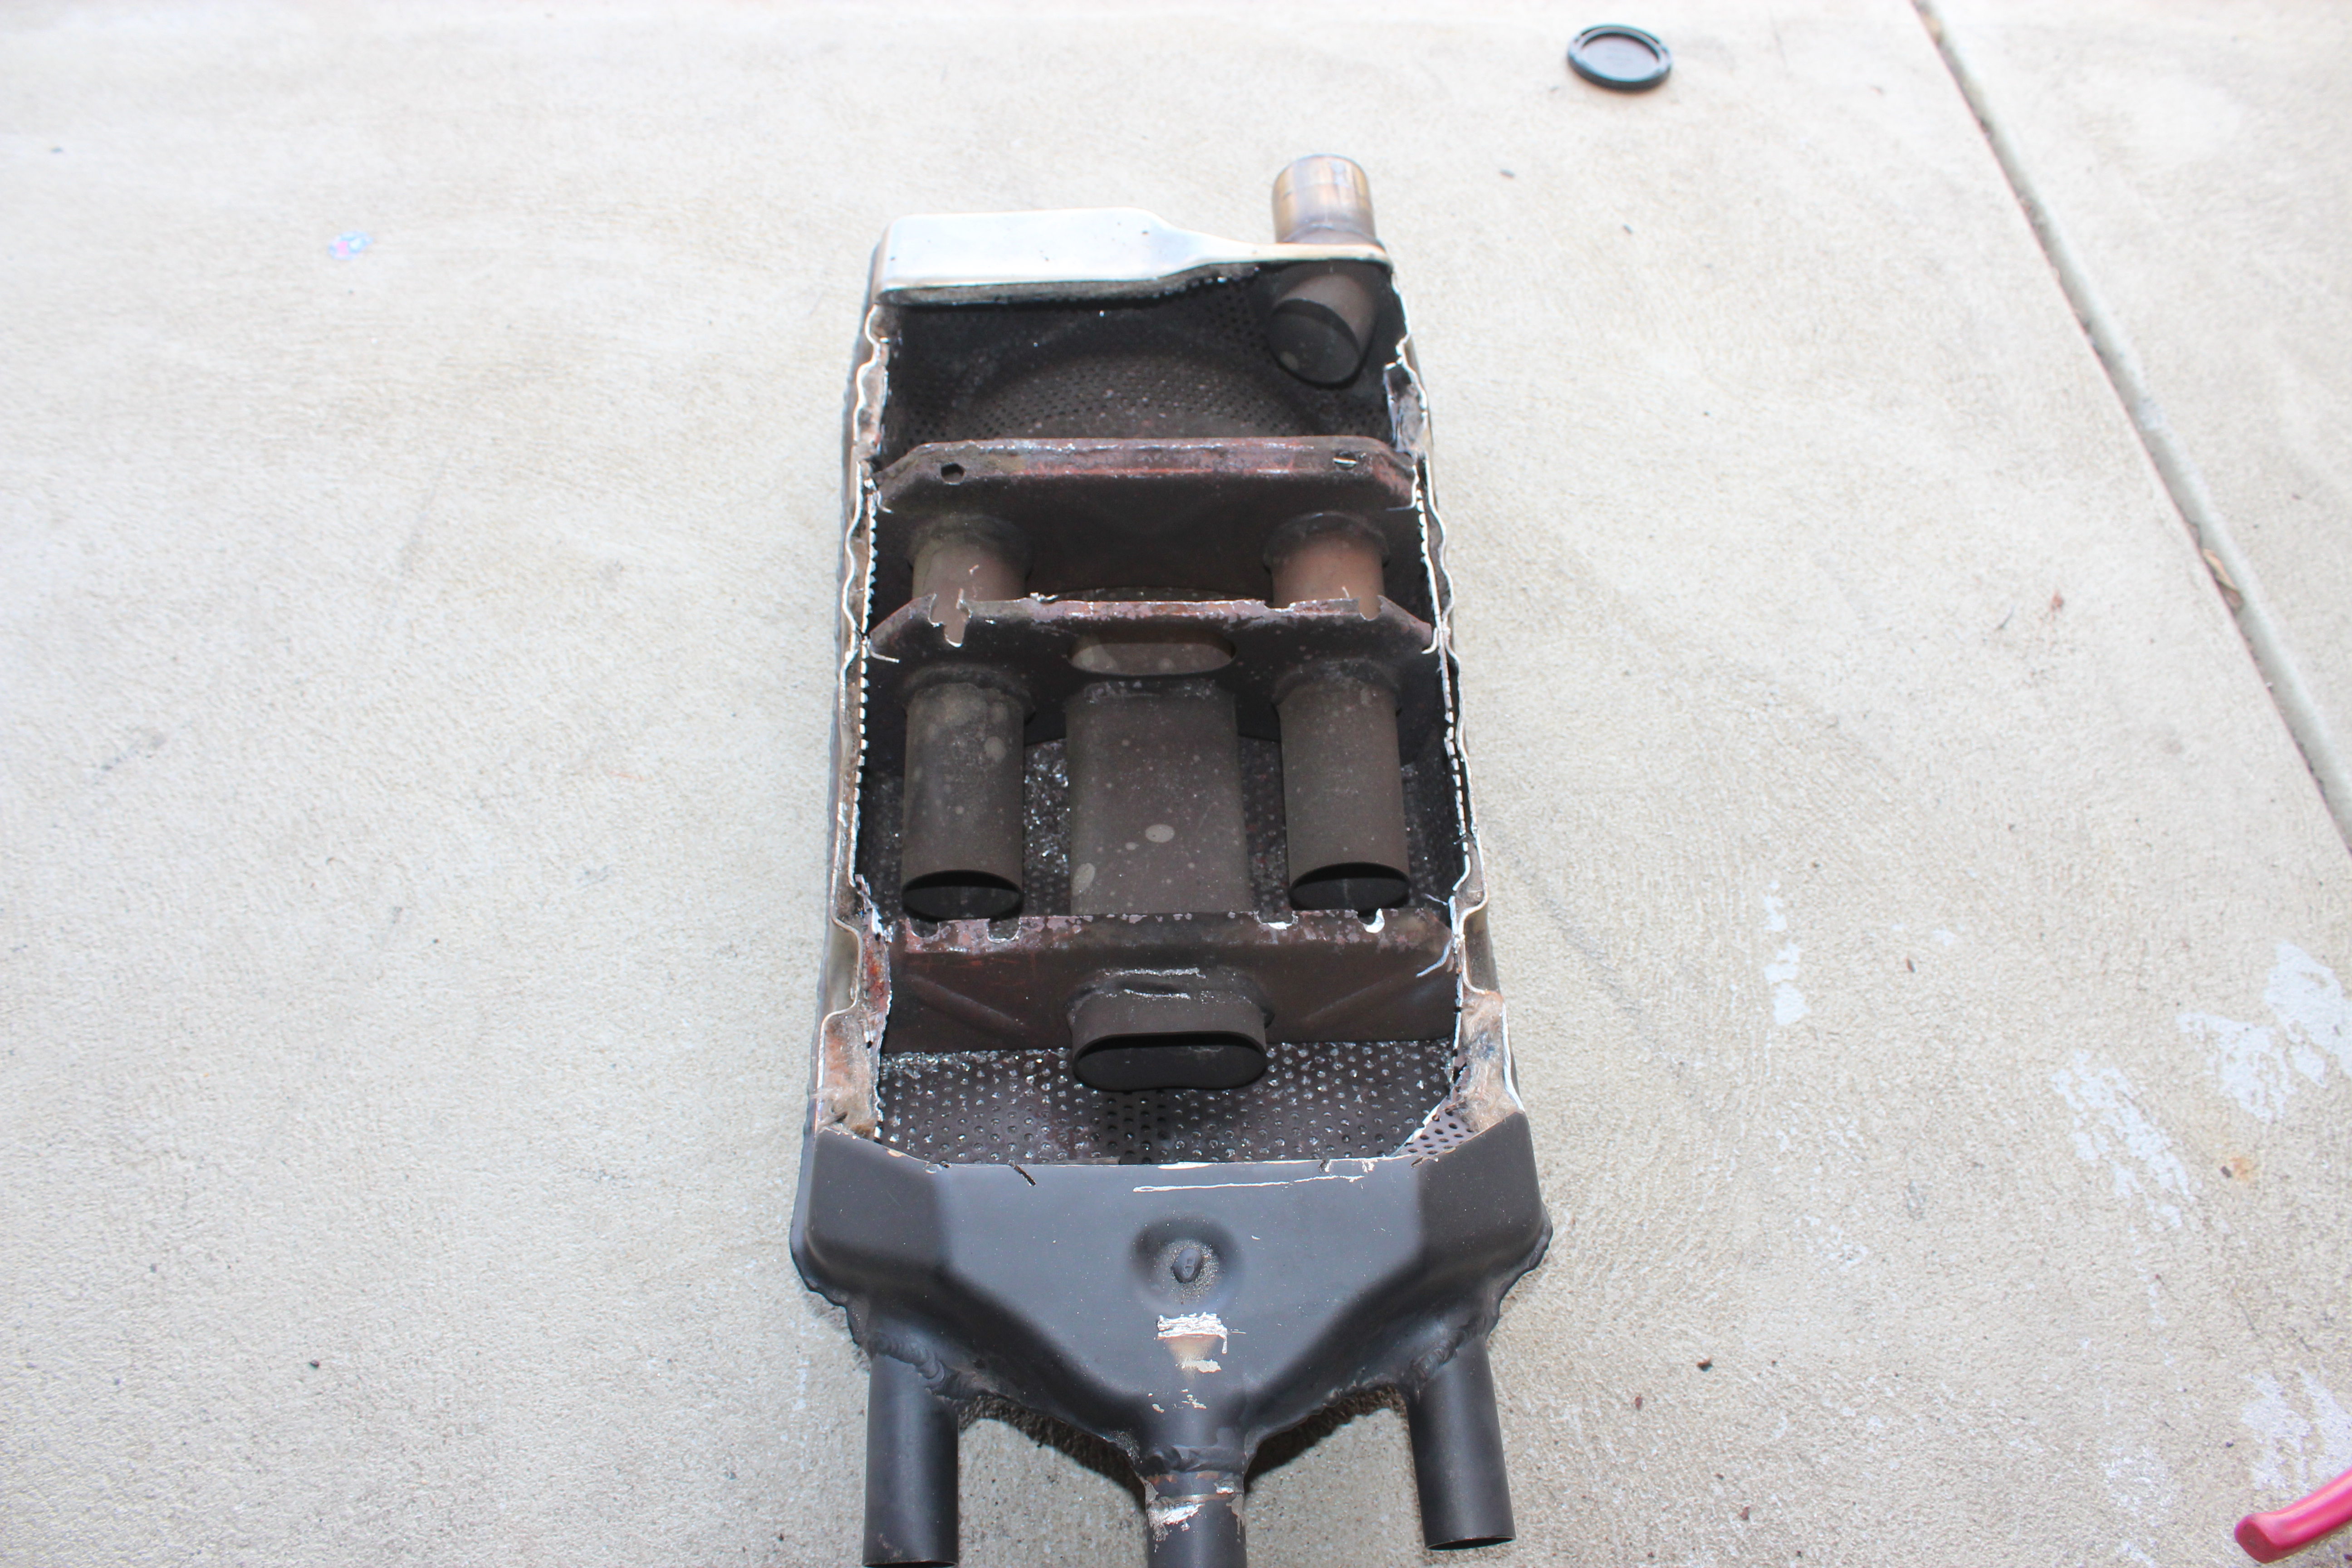
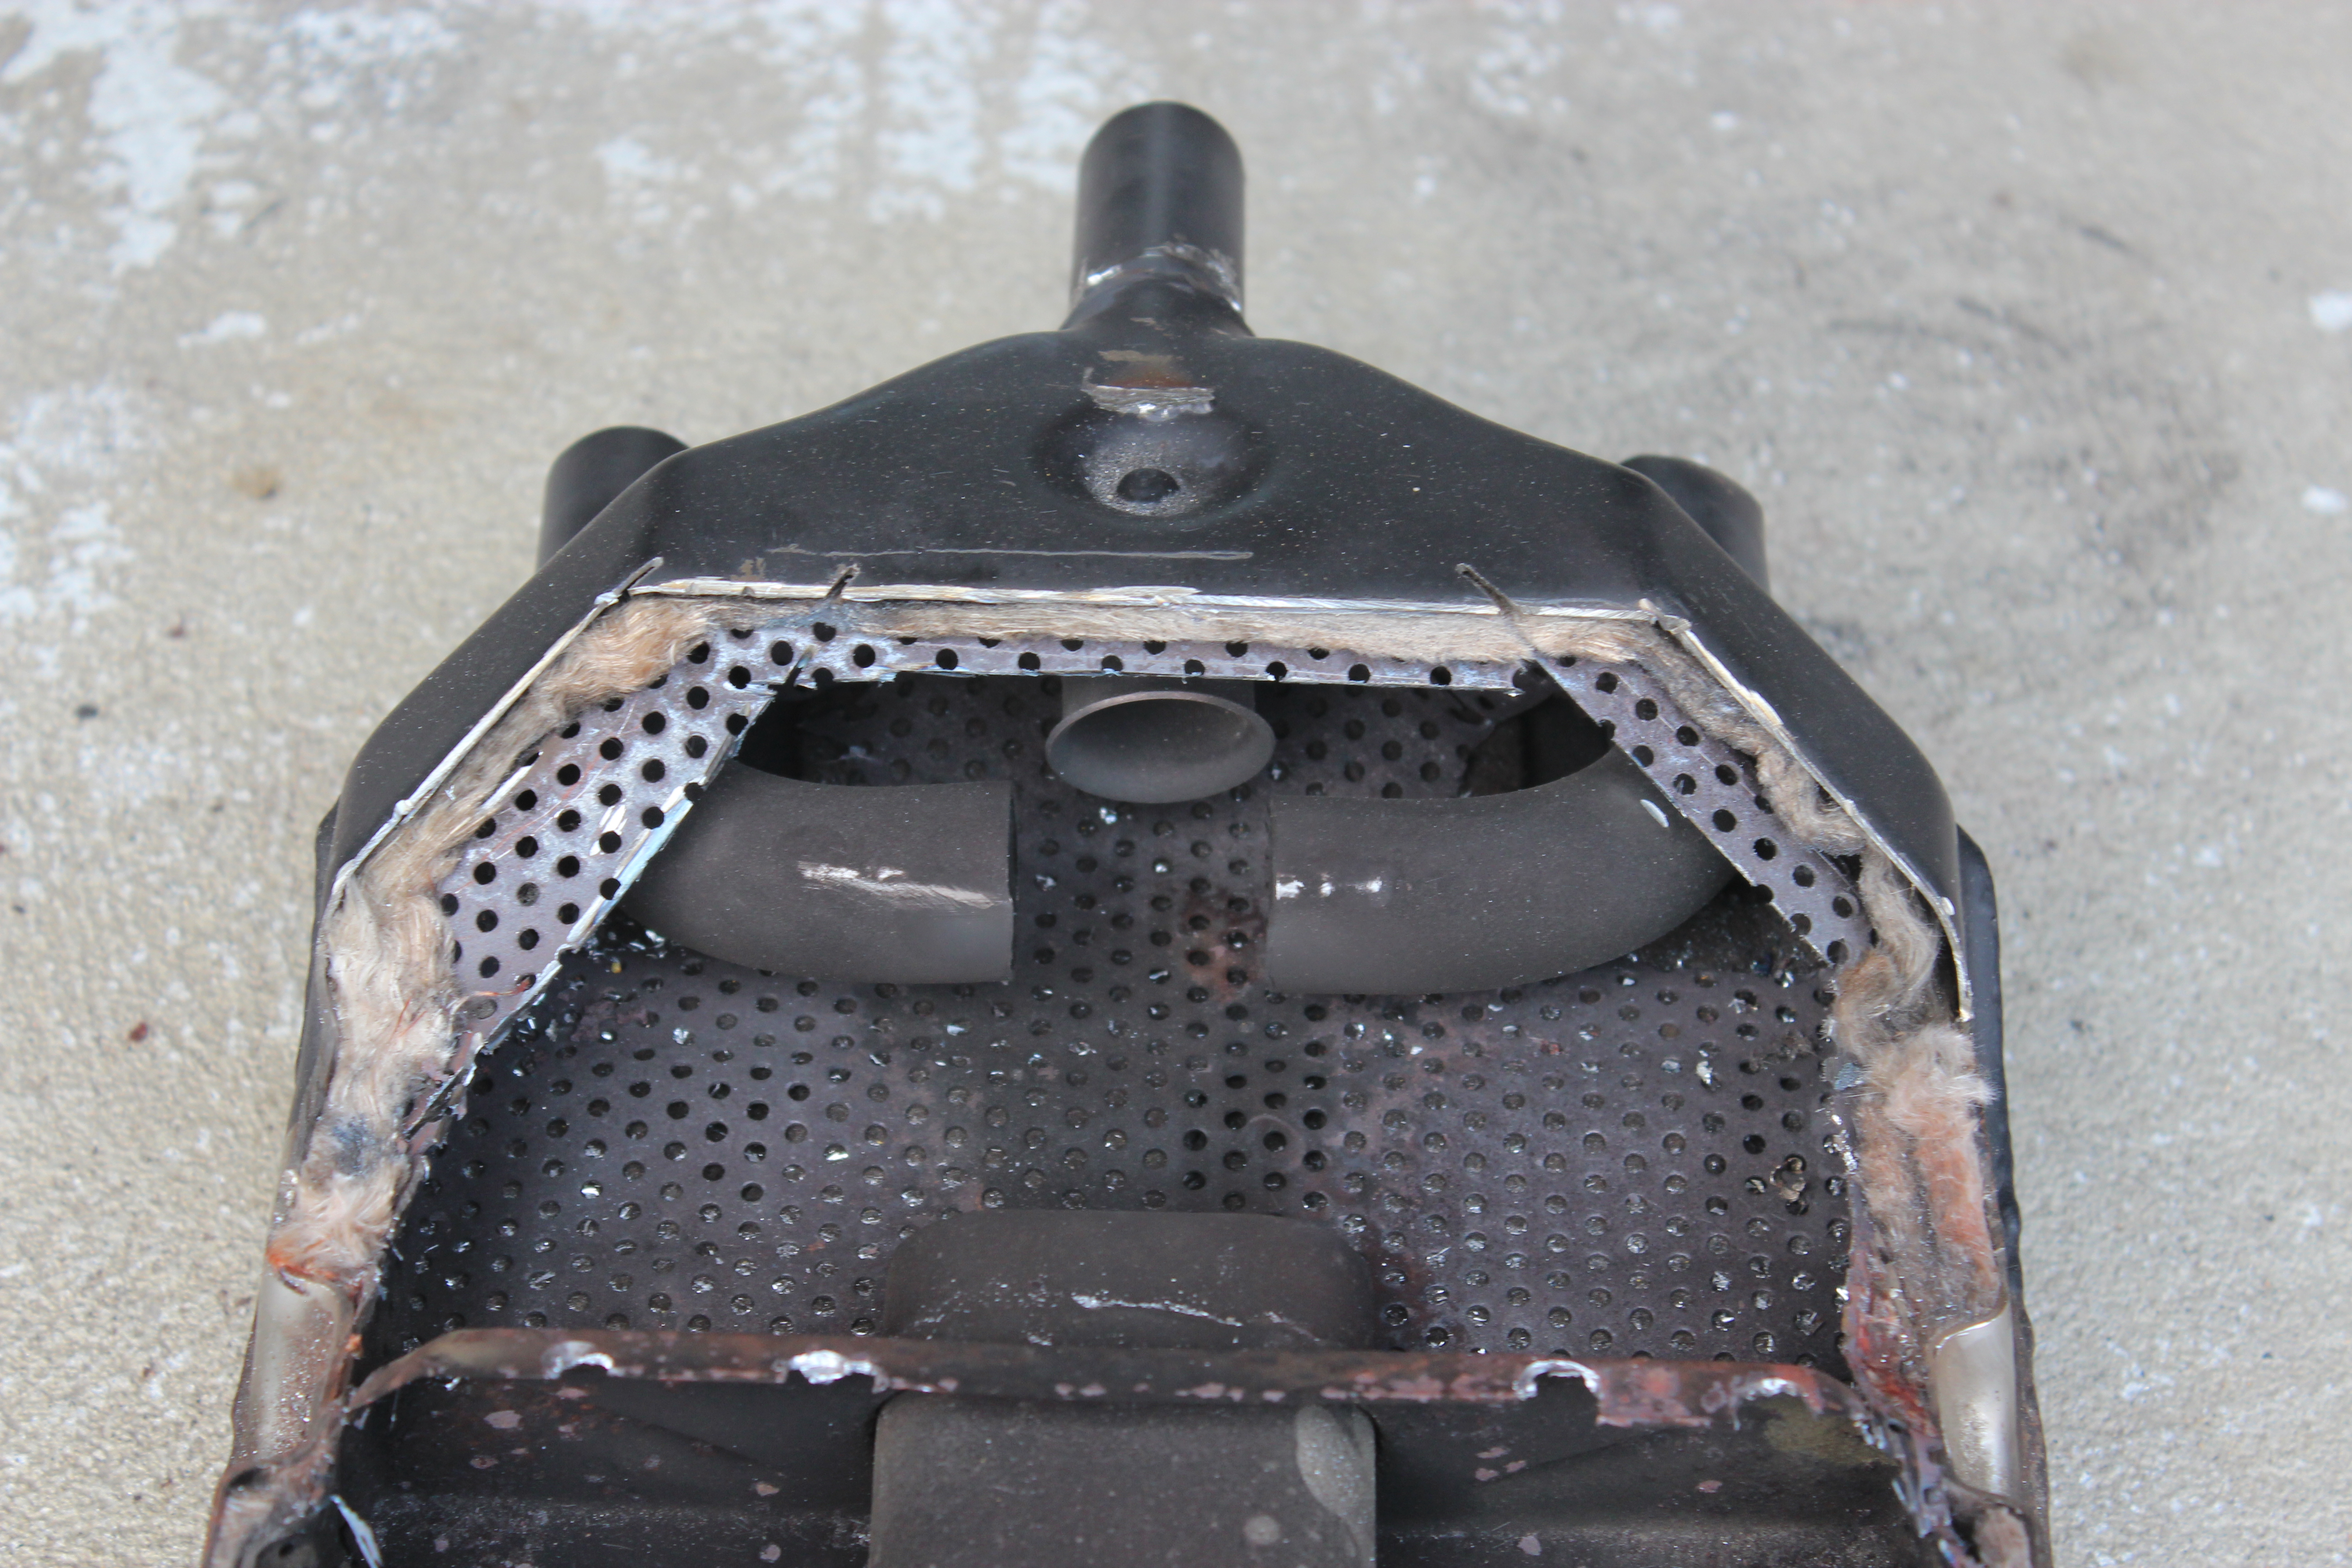
The first thing Darren noticed was the original pipe placement I had intended wasn’t possible as the “Hump” would place the internal pipe too high making it impossible to put the top back on unless the hump was bashed down, ( I wasn’t keen on that idea).
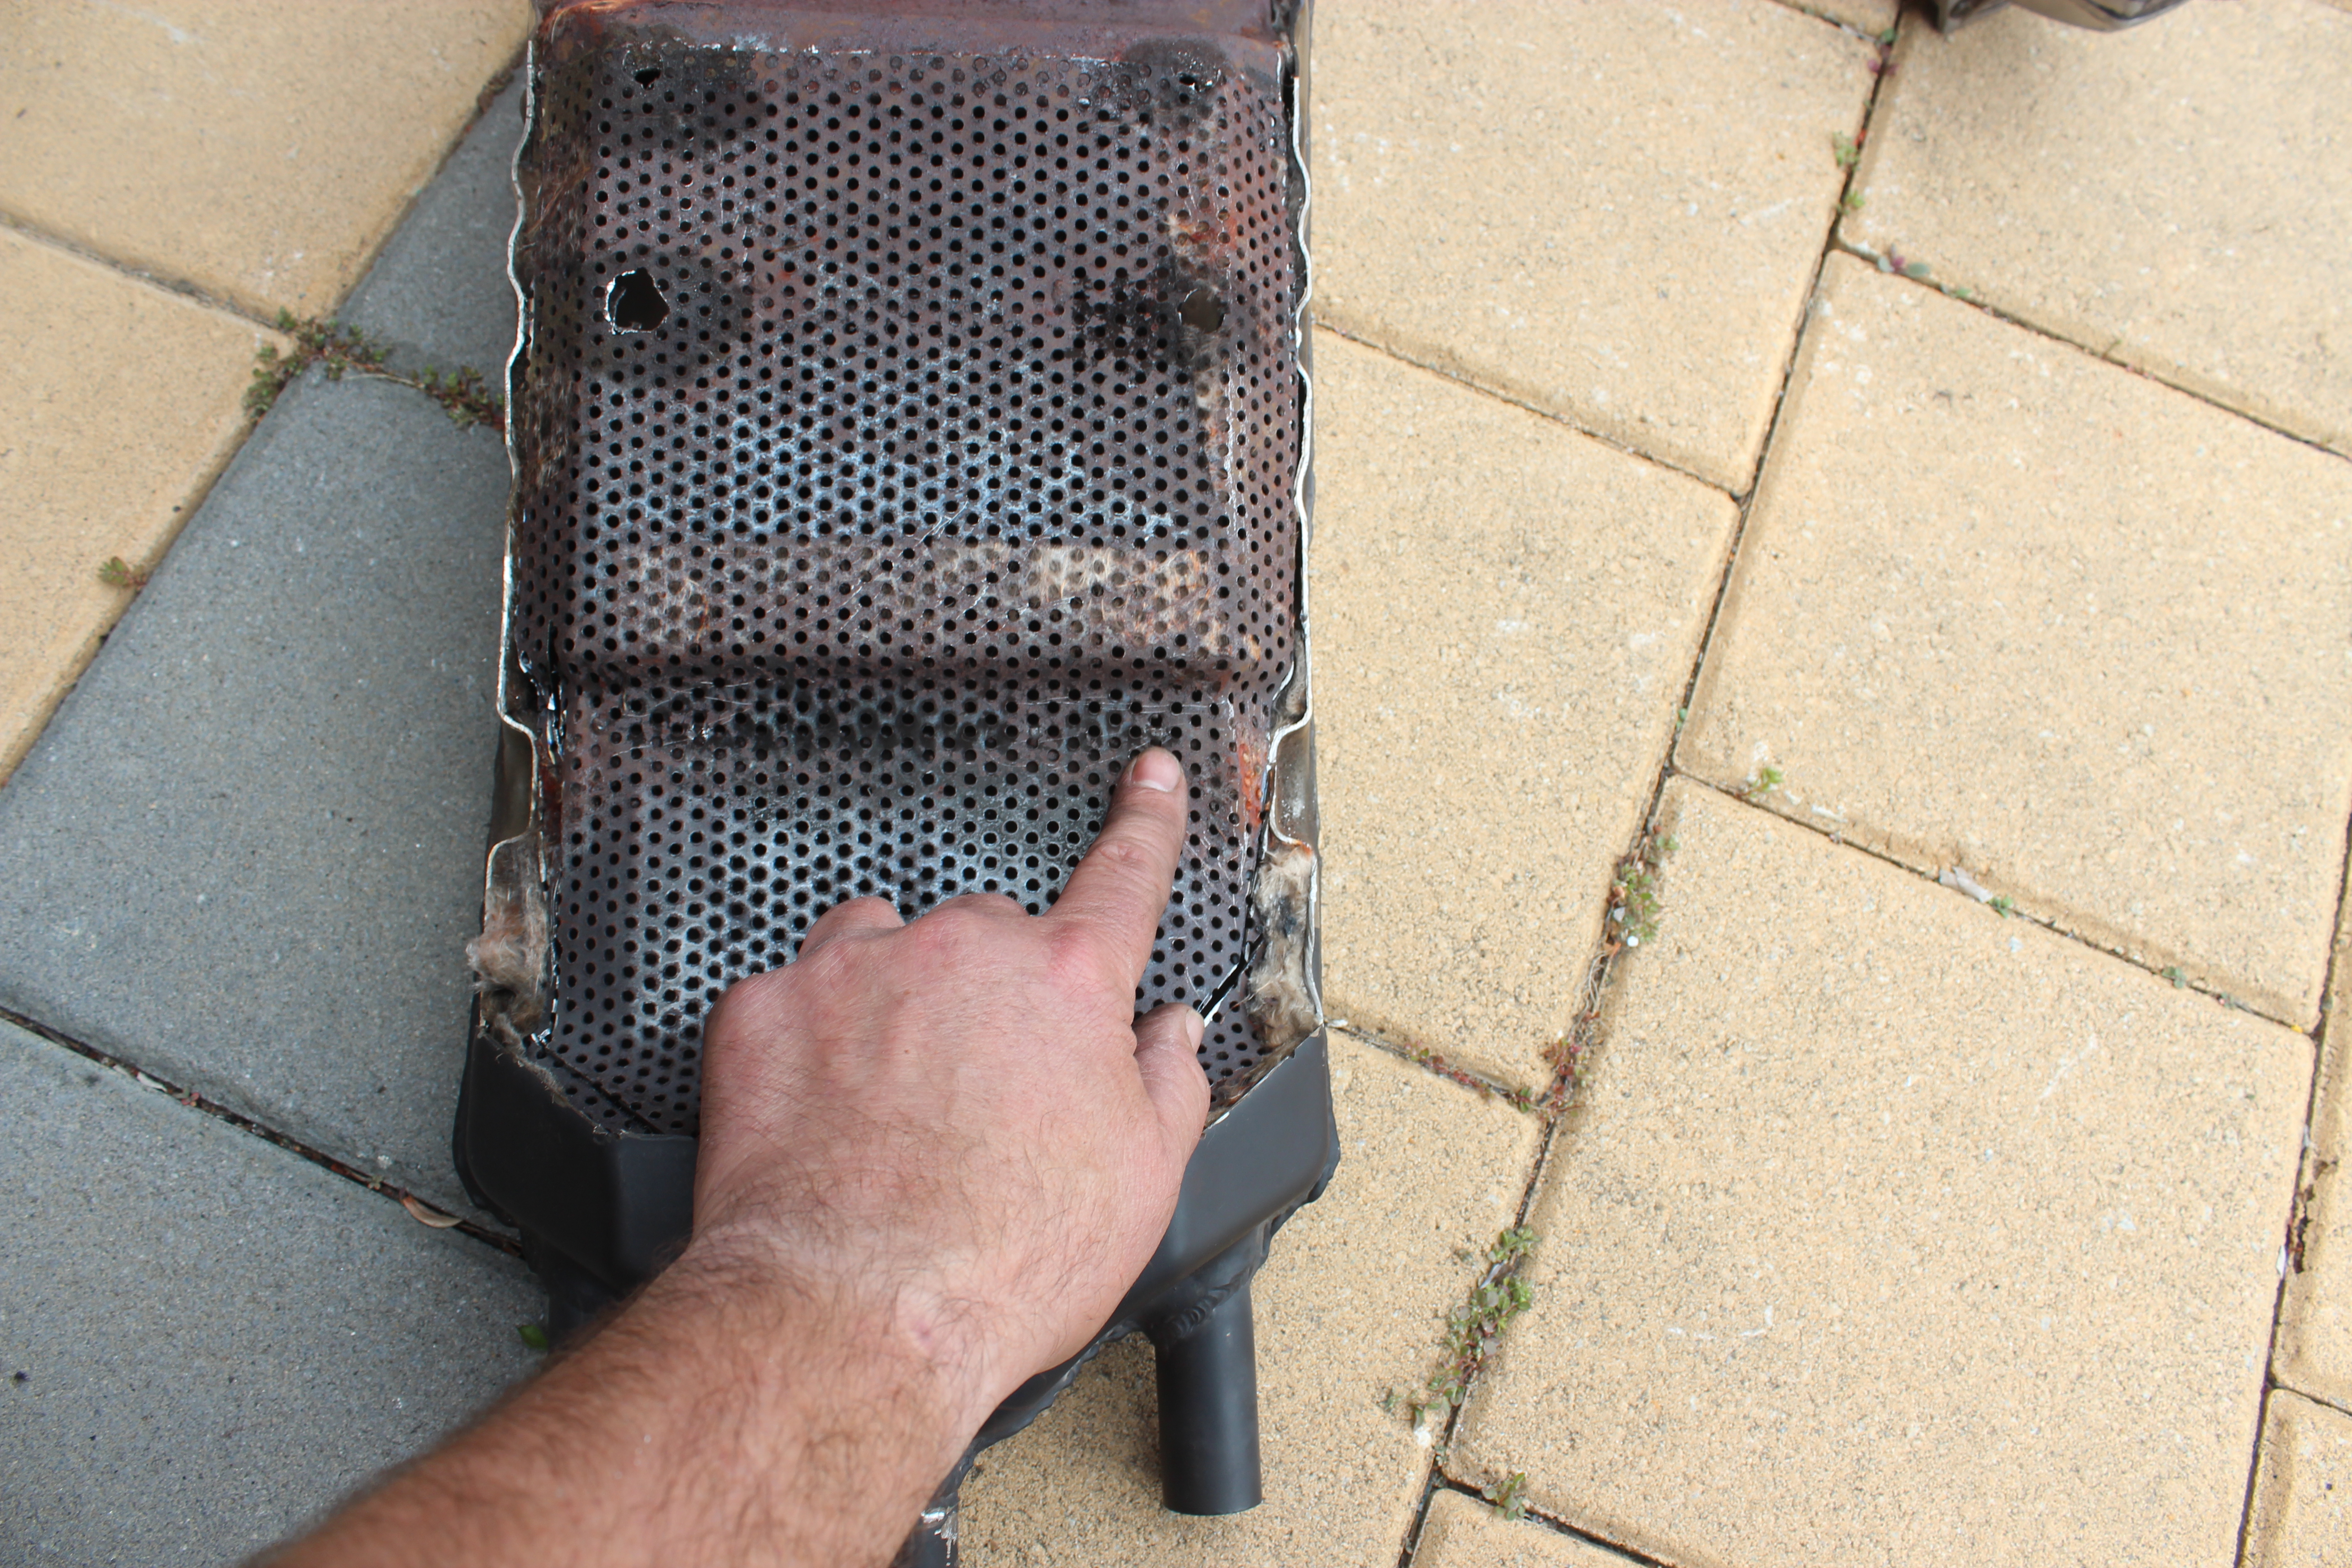
You can see below how ralphus went for the panel beating option.
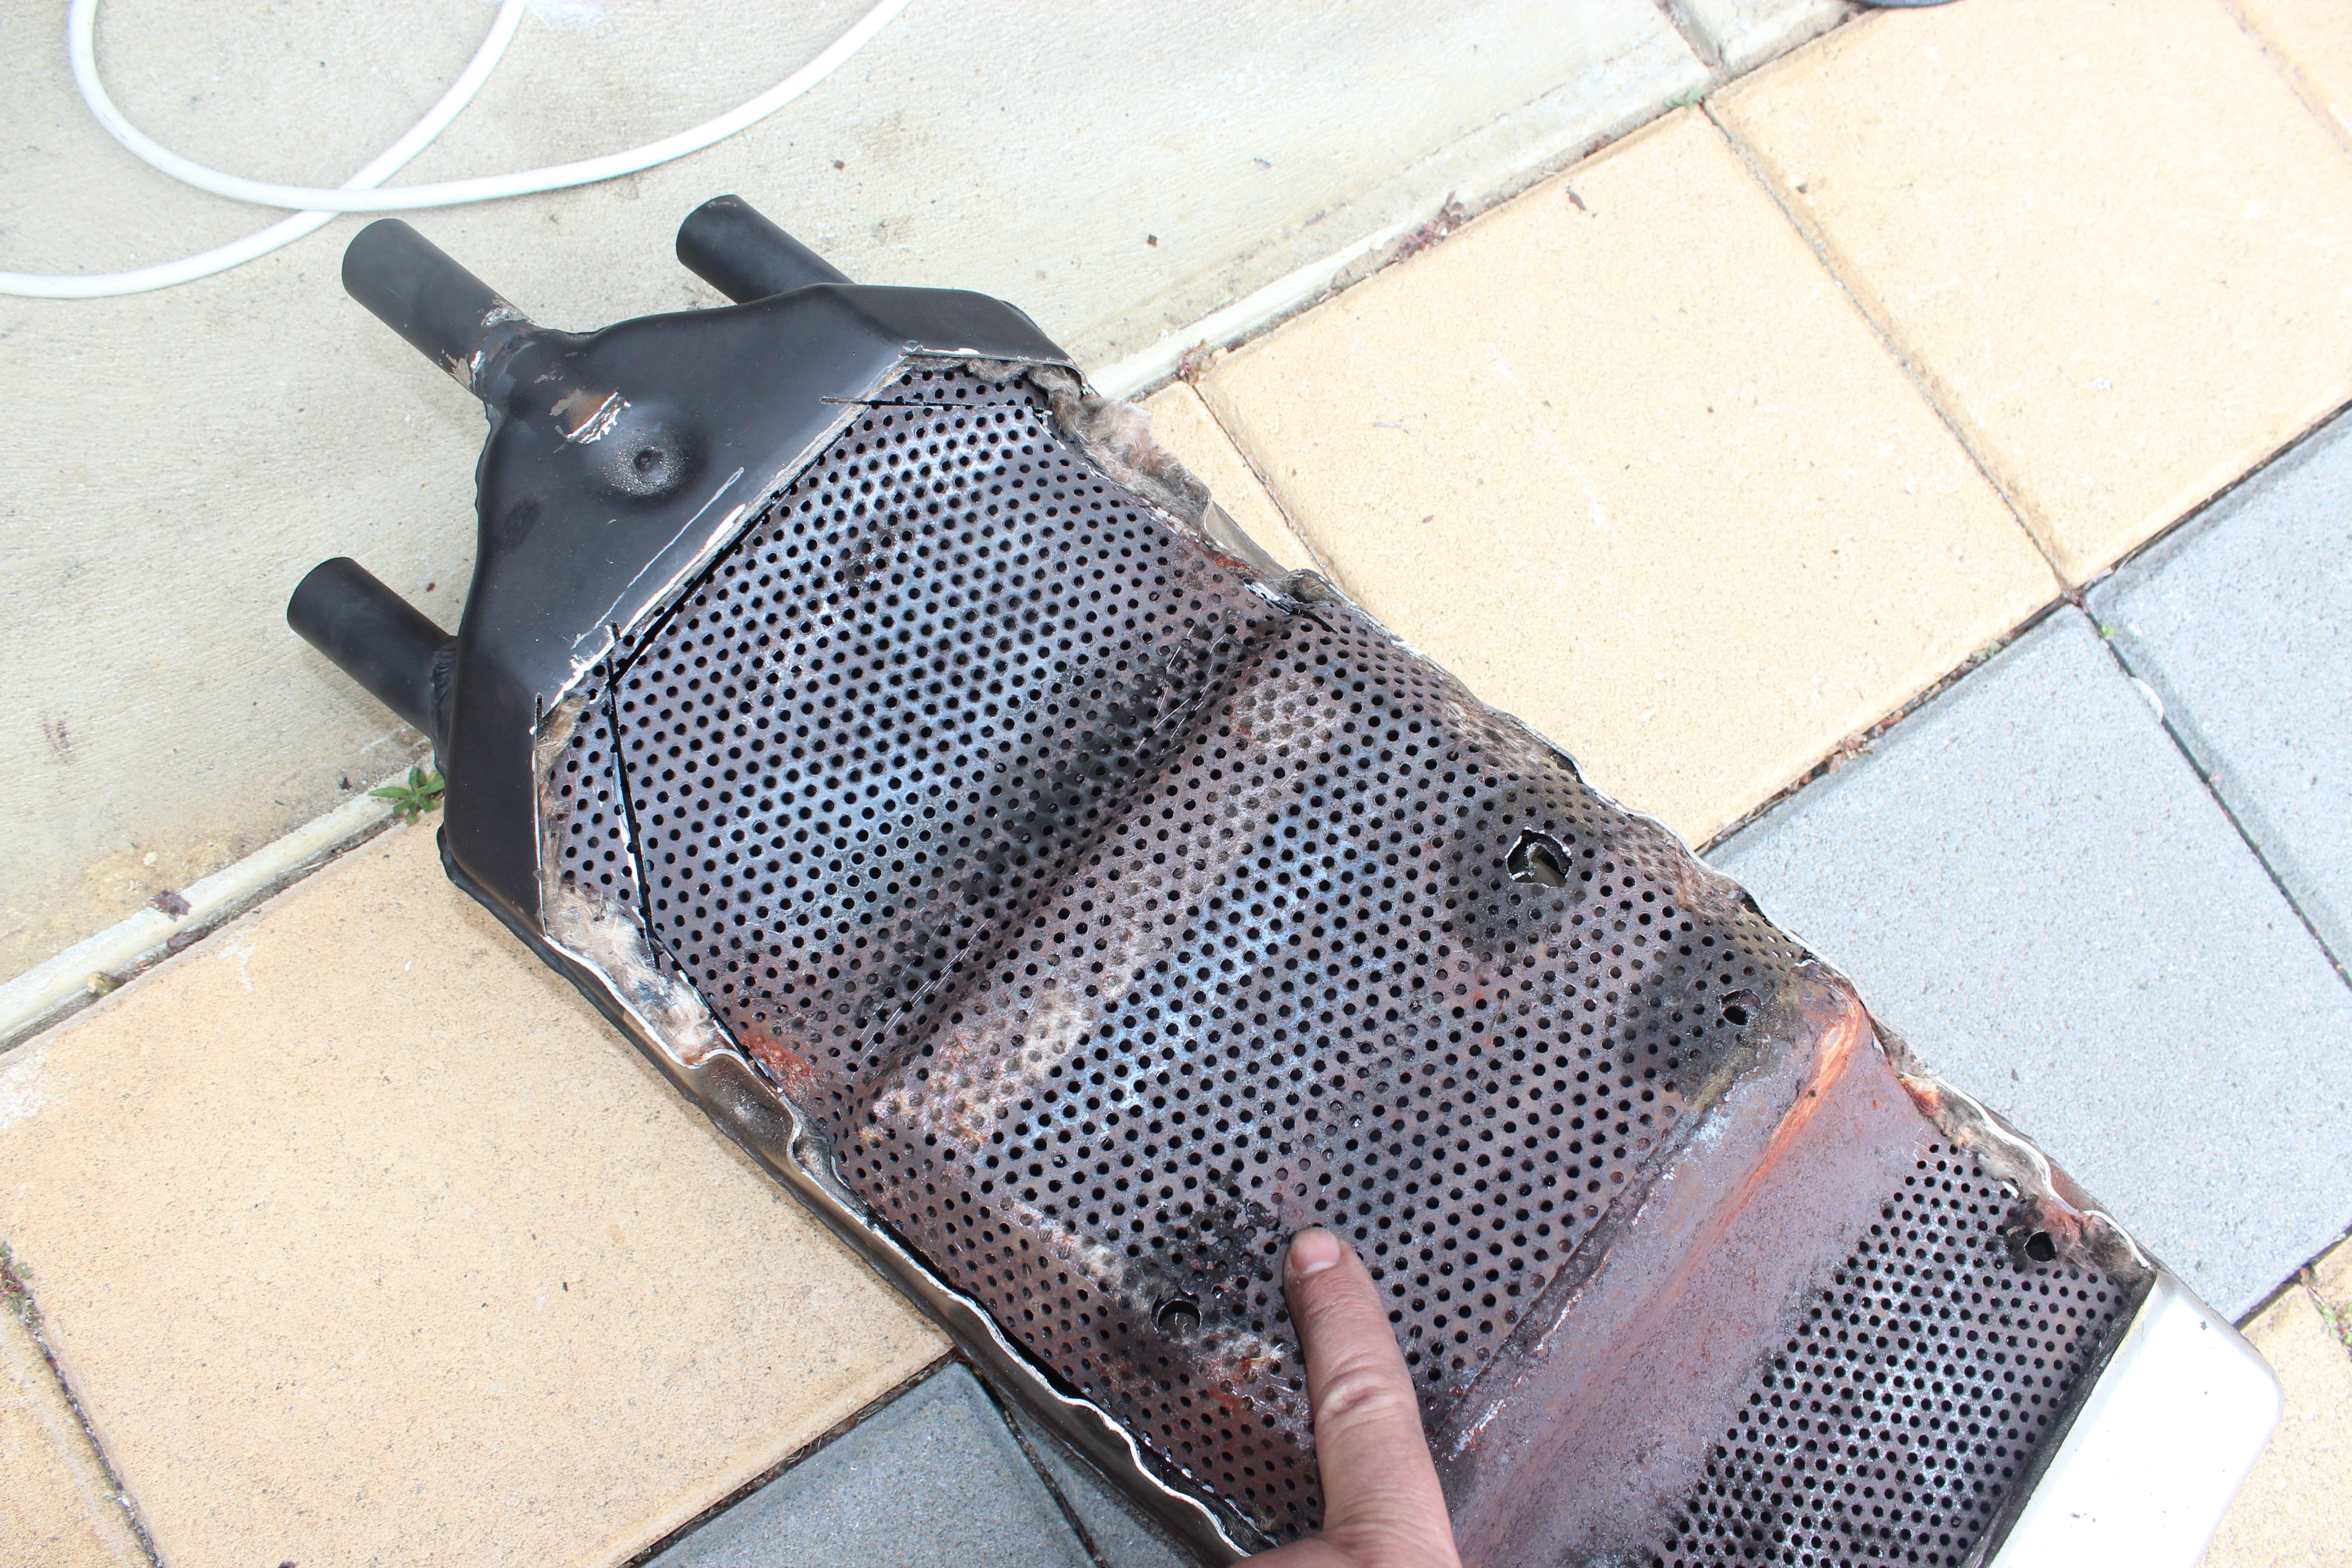
And this is the option we decided on below. You may also notice, comparing the two photos, I’ve totally removed the baffling.
Next was stuffing the packing in. I used some ceramic fiber matting called Fiberfrax this stuff is used in furnaces and can take temperatures of 1260ºC so I reckon it will be fine in this case.
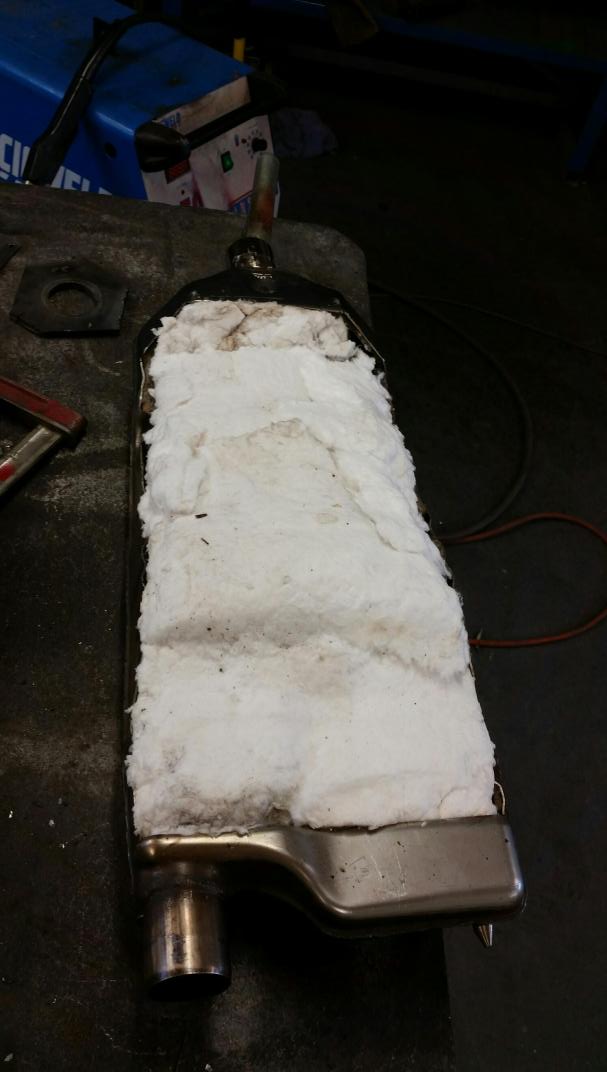
After packing the Fiberfrax in nice and tight the time came to weld the top back on, and fill in the rivet holes. Darren said even as a seasoned boiler maker he found it tricky to setup but once it was sorted he had no problems. 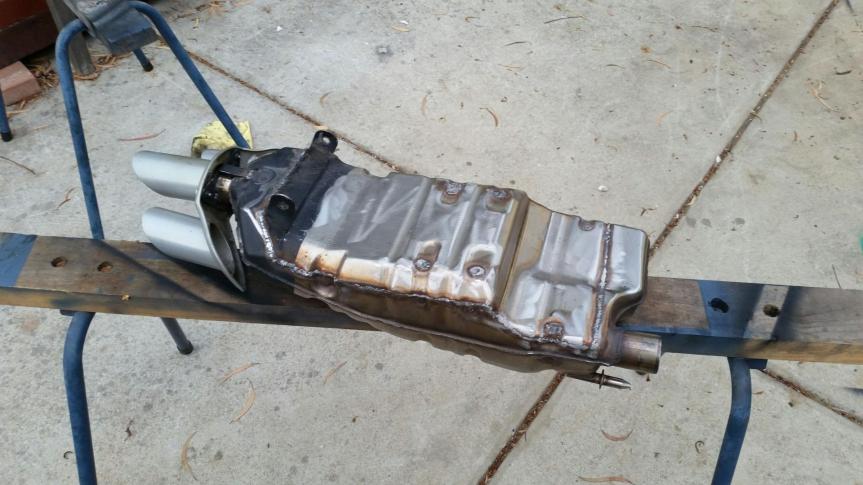
Next step is refit the muffler and install the TOR tune using TuneECU.
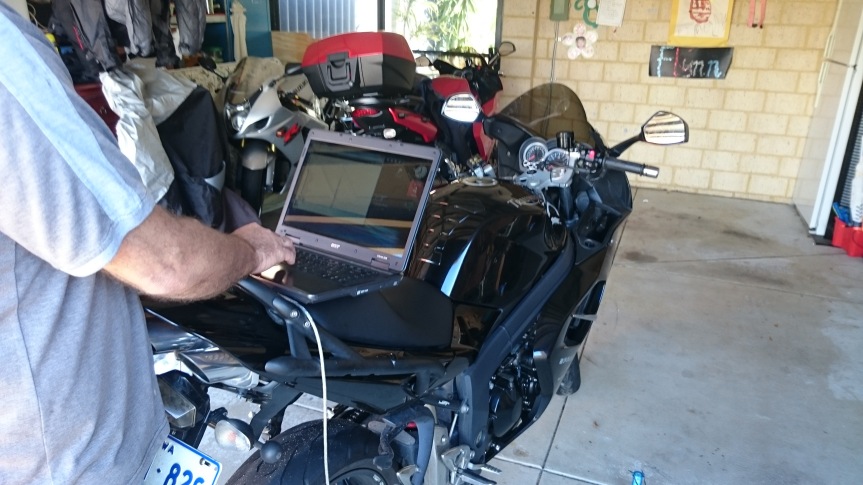
The muffler is now installed with a slightly tweaked TOR tune, the timing has been advanced in the closed throttle position to reduce the engine braking effect on deceleration, making it much smoother in slow riding conditions.
Video before and after modification
This is a link to a short clip of the before and after, the audio isn’t that great but it may give you some idea of the change in exhaust sound. Click me.
My thoughts on how this has changed the bike’s performance.
Prior to starting this modification I hadn’t had the bike on a dyno and i don’t intend to after either, this was a mod done on a budget so dyno tuning isn’t on the radar.
First of all the sound is not as loud as I thought it would be, maybe a bit more solid pipe on the internals would have made it louder, but it does have a very nice note, quite noticeable from 6000 rpm up. Initially there was a little bit of the fiberfrax coming out but it soon stopped after a couple of short rides.
As for power gains I am well impressed, without doubt a marked increase. The power is right across the range with a good quick response from low RPM with a better than expected increase though mid to high RPM hitting the rev limiter very quickly, with only the occasional pop on deceleration.
In conclusion.
This project has taken a long time to complete, with many hours spent in the garage (not that bad really). The overall cost wasn’t too much, maybe a bit more than I initially intended, after some extra tools were purchased, but defiantly a lot less than buying an after market system. If you or a mate cant weld stainless steel don’t go ahead with this I would think if you pay for welding it will cost a fortune.
Would i do this again? Probably not. Despite the power increase and total satisfaction of achieving a good home made performance modification, I would in hindsight save my dollars and spring the extra dollars for a factory made system. Having said that and re reading it I’ve got mixed emotions……maybe I would….

Great write up so far … waiting eagerly for the end result !
LikeLike
NICE MODIFICATION!, BUT ,WHERE CAN I GET THE TOR TUNE?
LikeLike
Hi Edgar
Sorry for taking so long to reply.
There are e few methods for changing the ECU the method I used was with TuneEcu a free program that you can get from this link http://www.tuneecu.com/
you’ll need a laptop and a cable to connect your bike to the laptop (or P.C. if you can get your bike close enough to it). The Tuneecu site recommends the best cable to get, and I would take there advice to not get the cheap Chinese knock off version.
You could also take your bike to a Triumph dealer and at a cost they would install the TOR tune.
The Tuneecu program seems a little daunting at first but if you read up all the information it’s not really as complex as one first thinks.
Good luck with your project, let me know how you get on.
LikeLike
What size baffle pipe was used? 51mm? I’ll be doing this on mine soon. Found a de-cat pipe for mine too!
LikeLike
Hi Jason
Yes mate it is 51mm.
I didn’t need to do a de cat pipe, luckily here in Australia they aren’t a requirement on motorcycles.
LikeLiked by 1 person
I’ve followed this for a long time and show others, currently going through it myself. Is it a solid exhaust that goes through the inside or 3 sections of baffle wrap which is layered on top of the exhaust or is it all baffle so exhaust fumes stay inside the exhaust.
LikeLike
Hi Sam
The original pipe work goes seems designed to push the gases back and forward, effectively ” lengthening” the time in the pipe. I was going to use a solid bit of pipe with the perforated bits on the end. This would have made it a lot louder.
I ended up using perforated pipe in all of the internals as I didn’t want it too loud. I used a product called fiberfrax that’s used to line furnaces, which filled the entire void.
I think if no packing was used it would be very loud, making it pretty much a straight through pipe.
LikeLike